
A Monotub is a fruiting chamber for growing a few (but not all) species of mushroom inside. A Monotub is a plastic tub that has been modified with holes in a way that makes it an appropriate vessel for the fruiting stage of mushroom growing.
How a Monotub Works.
The Monotub uses thermal air currents to provide fresh air exchange whilst retaining moisture inside of the tub. Because the Mycelium is a living organism that is eating the substrate it creates heat whilst digesting. This causes a thermal air current to develop inside the Monotub.
The Monotub works in the following way:
- Mycelium is spawned into a pre-prepared bulk substrate, mixed and placed into the Monotub (with the holes taped up preventing fresh air exchange).
- Once the Mycelium 100% colonizes the substrate the tape is removed from the holes in the tub and filled with polyfill or similar.
- The air around the substrate is slightly heated due to the thermogenics (heat generation) of the mycelium as it consumes the substrate.
- This heated air rises and exits out the top holes in the tub.
- This results in fresh cooler air being pulled through the holes in the bottom of the tub.
- The polyfill in the holes closer to the substrate is packed tightly whilst the polyfill in the higher holes are packed looser. This is done to prevent the substrate from drying out due to too much fresh air exchange.
- The fresh air provided to the mushrooms initiates a pinning response and the mushrooms begin fruiting.
How to Make a Monotub.
Requirements
Firstly you are going to need a tote similar to this, the larger the better (as you will get a larger yield), however, it's really up to personal preference.
Personally, I use a shelving system like this, as it gives me 4 decent sized Monotubs in one purchase. Alongside this, it is compact and can double up as storage If I need it.
Next, you will need:
- A round saw piece like this, which is a requirement to make the holes in your monotub. Normally the 2-inch piece is used to create a decent-sized hole.
- A drill (optional, I usually just heat the saw piece above and melt the holes in the box as it creates cleaner holes).
- A hygrometer – this will be to place inside the Monotub and check the RH during a grow.
- Plastic bag – this is to line the Monotub during setup.
Steps to create a Monotub.
Note if you are using a very large tub such as a 23 quart you will need two lower holes on each adjacent side.
Guide 1 – Using a Drill to create a Monotub.
- Gather all your items: Tub, Drill, and Drill piece. Then attach the Drill piece to the head end of the drill.
- For the bottom, holes place the drill about 2.5-3 inches from the bottom of the MonoTub. Smaller Monotubs should use higher holes so they can use more substrate).
- Very gently turn the drill forward and apply pressure until the drill teeth catch inside the plastic.
- Now, turn the drill into reverse mode and apply gentle pressure again. Doing this in a controlled manner will cause the drill to create a hole into Tub without cracking the plastic.
- Do this on adjacent sides of the Monotub.
- Next, perform the steps again but this time create 2 adjacent holes 2.5-3 inches from the top of the Monotub on the remaining sides.
Guide 2 – Monotub without a Drill.
- Gather all your items: Tub, Drill piece.
- Heat the end of your drill piece until it is hot enough to melt the plastic.
- Push the Drill piece into the plastic about 2.5-3 inches from the bottom of the MonoTub until it goes through. Smaller Monotubs should use higher holes so they can use more substrate).
- Next, perform the steps again but this time create 2 adjacent holes 2.5-3 inches from the top of the Monotub on the remaining sides.
- Next, take a Stanley knife and clean up any edges that may remain on the holes.
Note: Please do this outside in an open area with a mask on as melting plastic isn’t the healthiest.
How to Setup a Monotub.
- Give your monotub a quick wipe down with alcohol. Although Monotub tek is not really a fully sterile method (as you mix the substrate in non sterile enviroments) this will still give the mushrooms the best chance of survival.
- Take a piece of plastic sheet (such as a plastic bag) and cut it to size so that edges of the bag come up to just under the lower holes in the Monotub.
- Tape the sheet to the sides of the Monotub.
The reason we do this is, as the mycelium absorbs the water from the substrate begins to shrink. When the substrate shrinks it creates a microclimate between the substrate and the Monotub. Unfortunately, this microclimate is normally perfect for developing pins (high RH) and as a result, mushrooms begin side pinning inside the Monotub. When you line the Monotub the lining shrinks with the mycelium block as growth progresses stopping this from happening.
Alongside this, the sheeting is very useful for harvesting as you can pull the whole Mycelium block out without having to handle it.
Spawning a Monotub.
Spawning is the process of placing your mycelium into a bulk substrate inside the Monotub. This usually happens in the same procedure. It is advised to wear sterile gloves and a mask while performing this task. However, spawning a Monotub is definitely not a sterile procedure as you are transporting the spawn in the open air which is not sterile.
Alongside this people often have different techniques for spawning so I am going to outline how I do it but it's always best to experiment for yourself.
The steps below assume you have a pre-prepared bulk substrate and spawn.
- Get the Monotub set up in the way discussed above.
- Wipe down the liner with alcohol and allow it to dry momentarily.
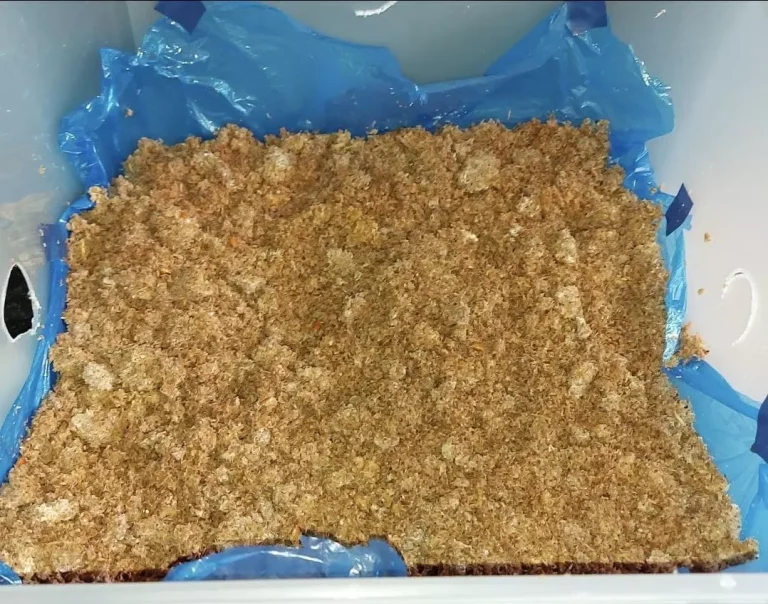
- Place a layer of Bulk substrate on the floor of the Monotub until you can no longer see the line on the bottom.
- Place a layer spawn. on top of the bulk substrate.
- Place a layer of bulk substrate on top of the spawn.
- If you have spawn and bulk substrate left, continue creating layers in a lasagne style.
- Once completed tape over your Monotub holes with a standard tape.
- Put the lid on the Monotub and place it into incubation conditions.
How to Fruit a Monotub.
When the Monotub is 100% colonized it is time to fruit the Monotub.
- Remove tape from the Monotub holes.
- Place loosely bundled polyfill in the top holes.
- Place tightly bundled polyfill in the low holes.
- Mist the Monotub when you can no longer see tiny droplets of water on the surface of the substrate.
Note: Be patient, in many cases it can take up to 2 weeks before pins form. If you keep making changes to the Monotub to induce pinning – more fresh air, less fresh air, more misting, less misting, scratching the substrate,etc all your going to do is tell the Mycelium that the climate here is not stable so it is not a good fruiting location.
When is a Monotub ready to Fruit?
This is species dependent but in most cases, once the whole substrate has turned white (100% colonization) and hyphal knots have begun to form.
What is the Purpose of Polyfill in a Monotub?
The purpose of polyfill is to maintain humidity inside the Monotub. If you removed the Polyfill it is more likely that the substrate will dry out in a short period of time. With the Polyfill, you will be able to retain more moisture inside the Monotub creating the perfect mix of humidity and fresh air exchange for fruiting.
You could also use micropore tape as an alternative. This is something I am going to start using as I seem to be having a fungus gnat problem which I think micropore tape could stop (I suspect they can burrow past the poly-fill).
When to Mist a Monotub
This is species-dependent but most Monotubs only need to be sprayed once or twice a day with a very fine mist. You want to see very tiny droplets glistening on the surface of the substrate when you shine a light on it.
If you have “dialled in” your Monotub you may not need to Mist at all through the whole fruiting cycle.
What is a “dialled in” Monotub?
Normally when someone has used the same Monotub multiple times they learn to set it up in an ideal way that the Mycelium does not need daily misting. This is done by getting the correct Polyfill tightness on the upper and low holes which creates the perfect level of fresh air exchange whilst retaining correct internal moisture levels.
A few other factors can also come into play such as the dryness of you’re home climate and temperatures. This is why people have to learn to “dial-in” their own Monotub through testing.
Lighting a Monotub
This shouldn’t be necessary as long as you’re Monotub is transparent and inside a well lit room. General indoor daylight hours will suffice.
How to Case a Monotub
- Give the Mycelium some time to completely establish inside the Monotub after spawning (full Mycelium coverage on the top).
- Add a fine layer of the sterilized (or pasteurized) casing to the top of the substrate inside the Monotub (normally vermiculite or coco coir).
- Lightly Mist the casing layer.
Which Mushrooms can be Grown in a Monotub.
You can grow a select few species of mushroom inside the Monotub although you are quite limited. The following species have been grown successfully inside a Monotub:
- King Oyster Mushrooms.
- Reishi Mushrooms.
- Chestnut mushrooms (Pholiota adiposa).
- Shaggy Mane.
- Enoki.
If you want to grow a larger choice of species you would probably be better off setting up a Martha (greenhouse) grow tent.
Conclusion.
The Monotub design varies greatly. A Monotub is usually a working process as people use different size tubs, holes and climates. Because of this, it is important to observe your tub once the bulk substrate is in the tub fruiting to decide if the substrate is getting enough fresh air whilst retaining humidity and modify the density of the polyfill if needed. Eventually, you will fully understand how to “dial-in” your Monotub with the correct fresh air exchange for all grows going forward.