
Cold water lime pasteurization is one of the most beginner-friendly methods for pasteruizing mushroom substrate out there. It has a trick up its sleeve that makes it stand out from every other method. While your straw sits in the solution overnight, it’s doing two jobs at once: hydrating and pasteurizing simultaneously. By the time you wake up, your substrate is ready to inoculate.
No heat. No specialist equipment. And a dramatically lower chance of contamination than if you’d skipped pasteurization entirely.
What is Cold Water Lime Pasteurization?
Cold water lime pasteurization uses hydrated lime calcium hydroxide dissolved in water to create a high-pH solution that kills off competitor organisms lurking in your straw.
At a pH of around 11-12, the solution is hostile to the mould growth, bacteria and other contaminants that would otherwise compete with your mycelium during colonisation. Most of these organisms simply can’t survive in such an alkaline environment.
The key advantage over heat pasteurization is that you’re not dealing with boiling water or trying to maintain a precise temperature for hours at a time. You mix your solution, submerge your straw, leave it overnight, and come back to substrate that’s ready to go, for straw and oyster mushrooms its hard to beat.
Why Cold Water Lime Pasteurization Is Particularly Clever
Here’s the thing that makes this method stand out from hot water pasteurization.
When you grow oyster mushrooms on straw, you need to hydrate the straw before inoculation anyway. Dry straw won’t colonise properly mycelium needs moisture to grow. The standard advice is to soak your straw in plain water for 12–24 hours before use.
With cold water lime pasteurization, you’re doing both steps at the same time.
The straw soaks for 12–18 hours in the lime solution, which hydrates it to roughly the right moisture level while simultaneously knocking back the competitor organisms. Alongside this the alkaline environment sticks around for a while allowing your mycelium to take over and establish in the substrate before competitors (in comparison other methods wherein competitors can re-establish once the substrate cools down.
For a beginner working in a small space with limited equipment, that’s a genuine time and effort saving that makes the whole process feel much more manageable.
Step-by-Step: How to Cold Water Lime Pasteurize Straw
Cold Water Pasteurization Calculator
Cold water lime calculator
For oyster mushroom straw pasteurization
At 2g per litre, expect a pH of 11–12. Lime quality and water source can affect the final reading verify with a pH strip if you want to be precise.
What You’ll Need
- Chopped wheat or barley straw (chopped to 3–5 inch lengths works best)
- Hydrated lime (calcium hydroxide not garden lime or quicklime)
- A large container a barrel, bucket or storage tub
- Non-chlorinated water (tap water left to stand for an hour works, or use filtered water)
- Something to weigh the straw down and keep it submerged
- Sawdust spawn for inoculation
- Gloves and a mask
- Grow bags or buckets for packing
A note on the lime: make sure you’re buying hydrated lime (calcium hydroxide), sometimes sold as slaked lime or pickling lime. It’s commonly available from agricultural suppliers, brewing shops or online. Do not use quicklime (calcium oxide) it’s a different product and not suitable for this process.
Safety First: Wear Your Mask and Gloves
Before you do anything else, get your personal protective equipment on.
Hydrated lime is strongly alkaline and will irritate your skin, eyes and respiratory system. Wear nitrile or rubber gloves whenever you have prolonged contact with the lime solution, as it may start to irritate your skin after a few seconds.
Wear a dust mask or respirator when measuring and handling dry lime powder. It’s a fine powder that gets airborne easily, and inhaling it is something you want to avoid.
Eye protection is also worth wearing when mixing the solution and handling the straw during draining. This isn’t a situation where you want to be cavalier the precautions take seconds and the alternative is no fun at all.
Keep this kit on throughout the process, right up until the straw has been thoroughly drained and you’re ready to inoculate.
Step 1 — Mix Your Lime Solution
Fill your container with cold, non-chlorinated water. The standard recommendation is 2 grams of hydrated lime per litre of water (0.2%), which will get you to a pH of 11–12 well within the range needed to knock back competitor organisms.
Stir well until the lime is fully dissolved. The water will turn a milky white colour this is normal. A pH strip or cheap digital pH meter will confirm you’re in the right range if you want to be precise, but the ratios above are reliable starting points.
Step 2 — Submerge Your Straw
Add your chopped straw to the lime solution.
Straw floats, so you’ll need to weigh it down to keep it fully submerged. The goal is to make sure every part of the straw is in contact with the solution throughout the soak. I usually place a brick or something heavy on top to keep it submerged at the bottom of the tank.
Step 3 — Leave it for 12–18 Hours
Cover your container to keep debris out and leave it for 12–18 hours.
This is where the magic happens. The alkaline solution is doing its job on the competitor organisms, while the straw is soaking up moisture and hydrating at the same time.
You don’t need to check on it or stir it. Just leave it.
Step 4 — Drain the Straw
After 12–18 hours, remove your straw from the solution and drain it thoroughly.
You’re looking for the straw to reach field capacity when you squeeze a handful, only one or two drops of water come out. If water is streaming out, it needs longer to drain.
This is where a shotgun fruiting chamber (SGFC) comes in handy if you have one. Instead of spreading the straw out on a surface to drain, you can fill the SGFC with the wet straw after pulling it from the solution. The mesh base and side holes give the straw airflow from all angles while keeping it contained and bundled up, which speeds up draining without you having to spread it across half your kitchen. Just leave it in the SGFC for an hour or two outdoor in the fresh air until it reaches field capacity, then inoculate directly.
If you don’t have a SGFC, hang the straw in a net bag or old pillowcase to drain, or spread it on a clean surface. Give it at least 1–2 hours before inoculating.
Step 5 — Inoculate with Sawdust Spawn
Once your straw is drained and at field capacity, it’s time to inoculate.
For this method I prefer sawdust spawn over grain spawn. Sawdust spawn is already colonised mycelium mixed through hardwood sawdust, which means it integrates naturally with straw and spreads quickly from the point of contact. In practice, you tend to get faster, more even colonisation and a noticeably better success rate than with grain spawn.
Layer the spawn and straw into your grow bags or buckets, alternating between the two a layer of straw, a layer of sawdust spawn, and repeat until the container is full. Aim for roughly 10–15% spawn by weight relative to your dry straw weight, though more spawn means faster colonisation if you have it to spare.
Seal your bags or cover your buckets and label them with the date.
What to Expect After Inoculation
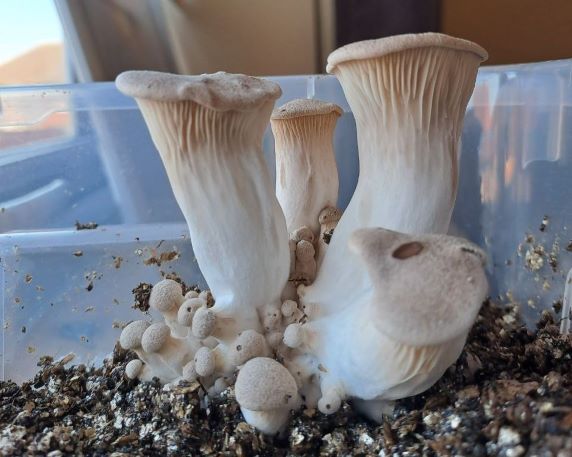
Within a few days you should start to see white mycelium spreading out from the spawn points.
Healthy oyster mycelium is bright white, fluffy and smells like aniseed. If you see green, black, or orange patches, that’s contamination isolate the block immediately.
Full colonisation of a straw block typically takes 10–14 days at room temperature (18–24°C). Once the straw is fully white throughout, it’s ready to fruit. Move it to your fruiting area, cut or open the bag, and increase humidity and fresh air exchange.
Oyster mushrooms are usually ready to harvest 5–7 days after pinning begins.
Pros and Cons of Cold Water Lime Pasteurization
Pros:
- No heat required — no stove, no gas burner, no boiling water
- Hydrates and pasteurizes at the same time, cutting out a step
- Scales easily — use a larger container for bigger batches
- Low cost — lime is cheap and widely available
- Consistent results when done correctly
Cons:
- Requires careful handling due to the alkaline solution
- Face mask and gloves required
- Less effective on high-nutrient substrates than full sterilisation
- The lime solution needs responsible disposal don’t pour it directly onto plants
Final Thoughts
Cold water lime pasteurization is one of those techniques that, once you’ve tried it, you’ll wonder why you ever spent time boiling water.
It’s beginner-friendly, low-tech, and the fact that it hydrates and pasteurizes your straw in a single overnight soak makes it genuinely more efficient than most alternatives. Pair it with sawdust spawn and you’ve got a setup that stacks the odds in your favour from the start.
Get your gloves and mask on, mix up the solution the night before, and come back in the morning ready to inoculate. It really is that straightforward.
Tried this method before or have questions about the process? Drop them in the comments below.