
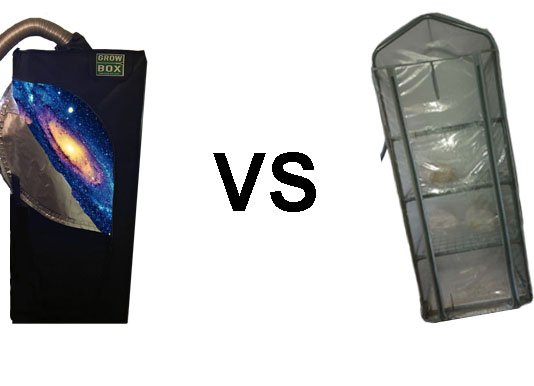
Normally when people are looking to build an automated mushroom fruiting chamber Martha tek is what they are looking for. The name originally comes from the Martha Stewart Portable Closet which someone converted into a fruiting chamber (it's basically a close rack wrapped in polythene).
These days most people are referring to a 4 tier greenhouse which is modified to create an indoor fruiting chamber. It is possible to get a martha fruiting chamber setup automated and some people overcomplicate the builds in my opinion.
Then again, it is quite enjoyable building and automating grow chambers so I can't really blame them.
Although I kept my build relatively simple, growing gourmet mushrooms inside a small greenhouse was definitely exciting. You will most likely notice an increase in your yields compared to SFGC and Monotubs as the fruiting bodies have ample humidity.
Alongside this, it makes the fruiting stage a far less cumbersome ordeal. No more opening, misting, fanning every few hours just pop the fully colonised substrate into the greenhouse, set your humidifier on a timer, then wait.
While building my martha fruiting greenhouse I actually tried a few different setups (managed to break one humidifier out of three) before settling on the one I thought was simple and effective which I will discuss in this guide to building a martha fruiting chamber.
How to Make a Martha Tek Fruiting Chamber
While building my martha fruiting greenhouse I actually tried a few different setups (managed to break a fair few humidifiers too) before settling on the one I thought was most effective and simple which I will discuss in this post.
I will also discuss another build I had created and my dream build if I had more space.
Setup Guide 1. – Small Greenhouse Fruiting Chamber (My recommendation).
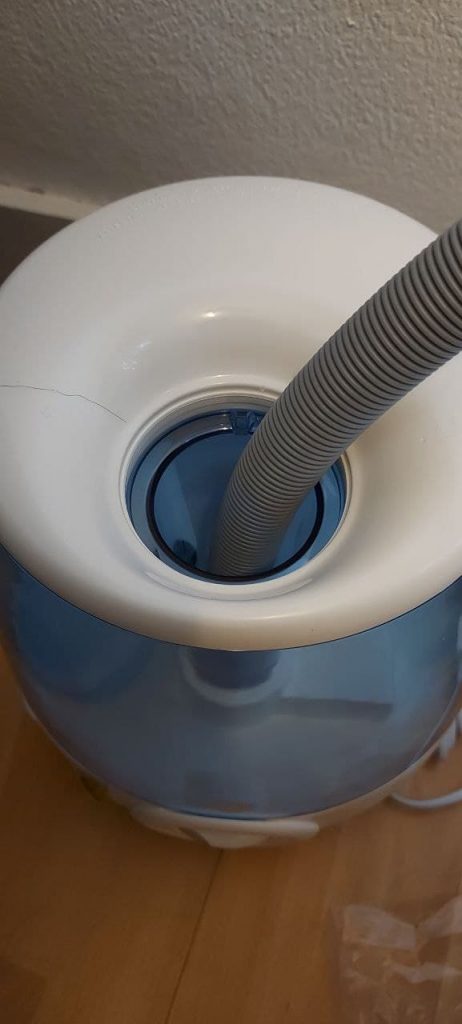
This is my current setup, it is simple, cheap and doesn't take up a lot of space (something I wish I had more of). It uses a washing machine drain hose to duct in the humidity from a humidifier that sits outside the greenhouse.
The hose fits perfectly snug into the top of the humidifier which means there is no modification to be made which will save your warranty as these things are very flaky especially when “misusing” them.
Personally, I think this is the best tek for a small martha tek as it is simple and effective.
Pros
- Low Cost.
- Relatively small.
- No lighting is required (if positioned in the window room).
- The Humidifier doesn't require modification making it simple to maintain, clean and setup.
Cons
- The bottom requires a tray to catch moisture.
- Cant grow CO2 intolerant strains.
- Moisture can seep out to the floor so it requires extra polythene around the system.
Requirements
Digital Plug Timer – I use one of these however a smart plug could also work.
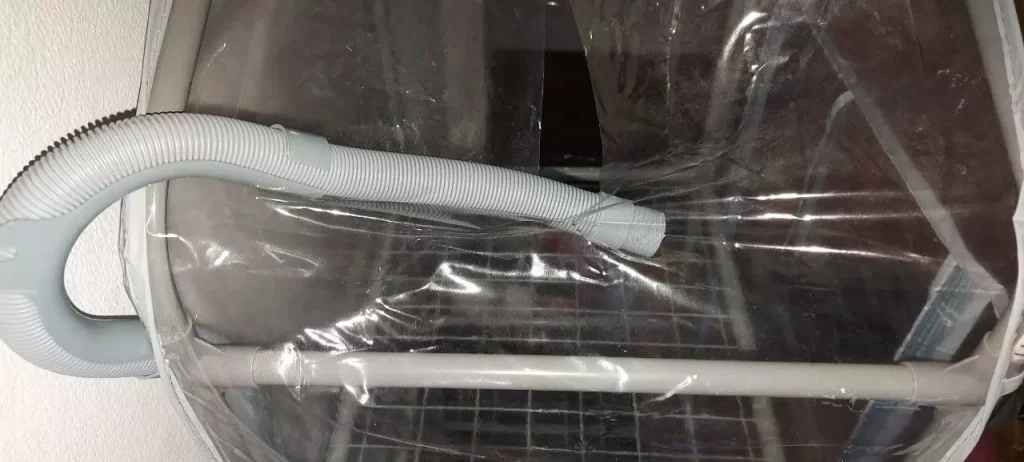
Washing machine drain hose. This is a must have you can cut the insert to size and push it into the hole for the humidifier which means there is no modifications needed which can void your warrant.
Vicks Humidifier. Any humidifier will do really if you get the hose above, just ensure it doesn't have a button to turn on or you wont be able to automate it
Pet tray. This is to catch the moisture and is where the perlite will be kept.
Polythene – for floor protection, i just recycle from plastic bags or similar.
How to setup the greenhouse
Step 1. – Find an appropriate place for your build. You will likely need a room with a window and a socket to plug in your humidifier.
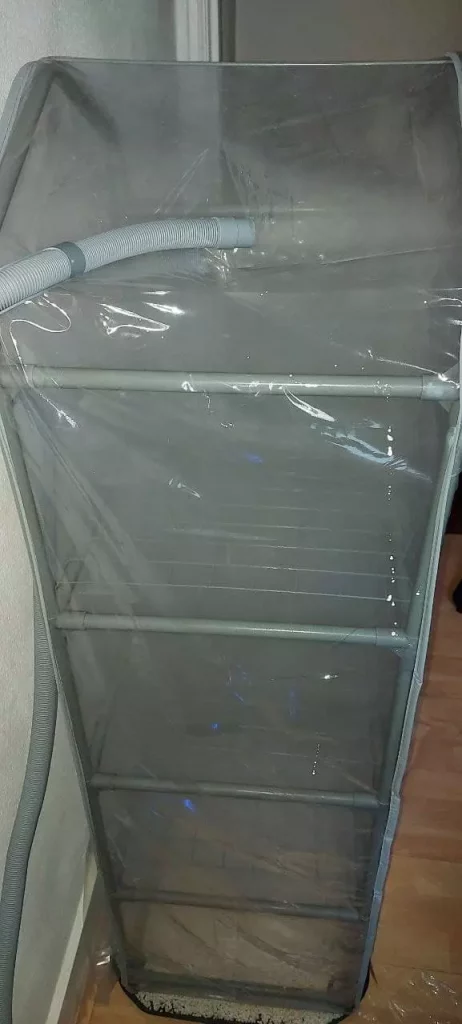
Step 2. – Build the greenhouse in line with instructions provided in the box.
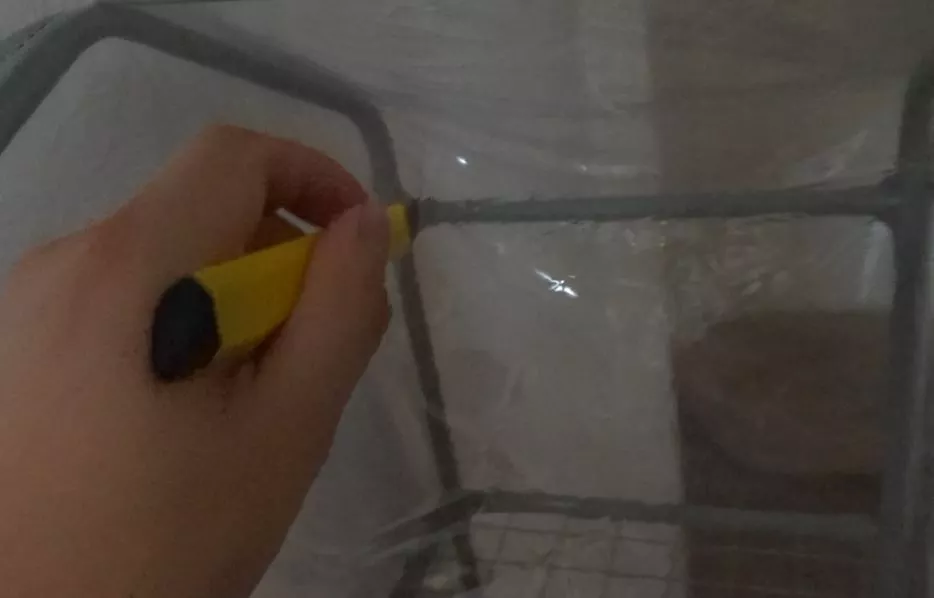
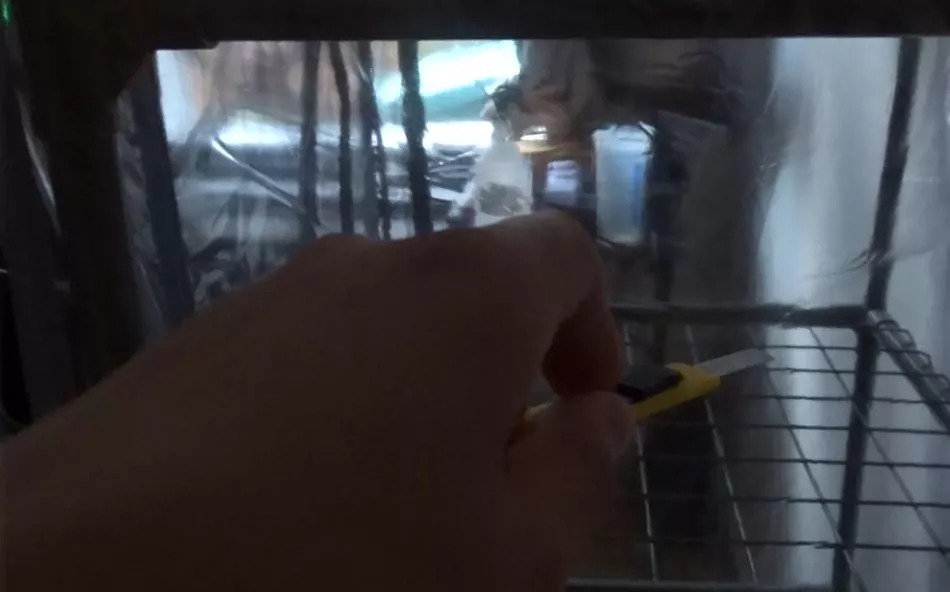
Step 3. – Take a Stanley knife and make slits in the sides of the greenhouse to provide fresh air exchange.
I have made the following in mine:
- Six slits in the top 4-6inches in length (most being about 5).
- Two horizontal slits (left and right sides) 4-6inches on the first two rack sections.
- I have left the other two sections without any slits. I make the decision to move the mushrooms up the racks as the fruiting stages develop to provide more fresh air.

Step 4. – Lay down some polythene (if required) and place the tray on top. Fill the tray with a layer of perlite then place the Greenhouse on top of the tray.
Step 5. – Setup your digital timer to the On cycle you wish to use. I turn mine on every 2 or 2.30 hours for 15 minutes. I tend to leave larger gaps in the time during the evening hours as it's colder.
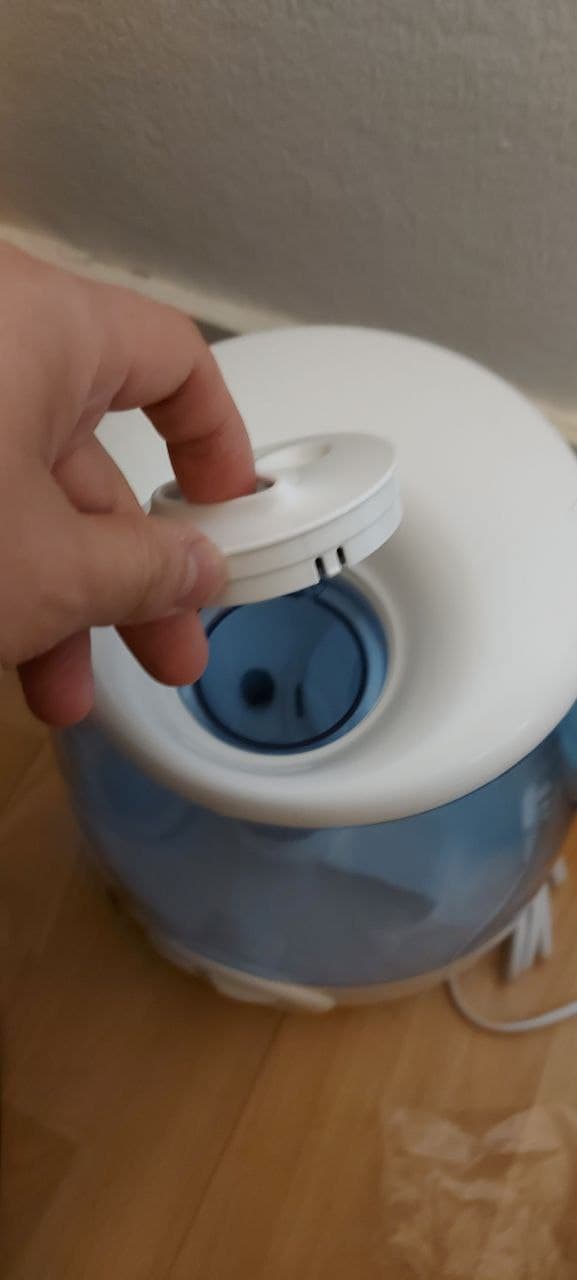
Step 6. – Set up your humidifier Take out the directional piece which usually sits at the top of the humidifier.
Next, place the washing machine hose down the hole until it fits snuggly (you may need to cut it to get it too fit).
I position the washing machine hose into one of the top fresh air exchange slits facing the front wall.
When turned on this provides both humidity and airflow to the greenhouse

Step 7. – Turn on and maintain by regularly cleaning out the humidifier (weekly) to avoid it breaking and the greenhouse, after every grow cycle.
Place in your fruiting blocks when they are 100% colonised near the bottom of the rack and move them upwards as pinning and fruits begin to form.
Note: It is sometimes suggested to place your humidifier on the floor of the greenhouse instead of piping it in from outside. When I did this my humidifier broke pretty quickly due to excess humidity reaching the fan of the humidifier. I also struggled to reach higher humidity levels using this technique.
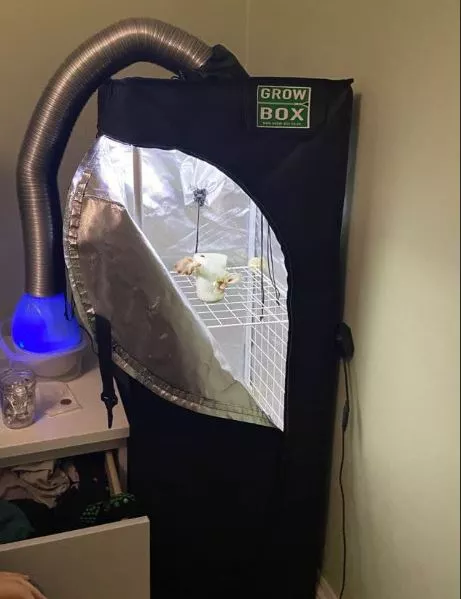
Setup Guide 2. – Grow Tent Fruiting Chamber (a setup I’ve tried).
Realistically if you have the space, you could create a professional setup using a grow tent.
I built a Martha fruiting chamber using a grow tent at one point, however, I was not happy with it in the end. It had too many working parts, wires and it felt like overkill for what I was needed.
I would recommend this build for someone who going to setup in a room with carpet or who doesn't want to risk ruining the floor at all as the build is self contained with a base.
Pros
- The growing chamber is fully contained. Humidity, spores etc won't be leaking out onto your floor. It will all go onto the tent base.
- The use of an Inline fan can provide controlled FAE (fresh air exchange).
- Does not require any cutting of the tent.
Cons
- Expensive.
- Requires lighting.
- Lots of wiring.
- Modified Humidifier (loss of warranty).
Requirements
Washing machine drain hose. This is a must have you can cut the insert to size and push it into the hole for the humidifier which means there is no modifications needed which can void your warrant.
Vicks Humidifier. Any humidifier will do really if you get the hose above, just ensure it doesn't have a button to turn on or you wont be able to automate it.
Digital Plug Timer – I use one of these however a smart plug could also work. This would be used for lighting in this case.
Storage cubes (used for creating the shelving).
How to setup Grow Tent Martha Fruiting Chamber.
Unfortunately, I didn't take any pictures of setting up this martha chamber but I can describe what it was that I built and how I did it for you.
Step 1 – Find an appropriate place for your build. You will only need access to plenty of sockets for this build as the lighting is provided by LEDs.
Step 2 – Build the Grow tent in line with your instructions.
Step 3 – Setup lighting
Setup the lighting inside the grow tent. To do this I stuck the LEDs strips to the inside of the grow tent wrapping them around until the reel had run out. I then stuck the wiring out of one of the grow tent vent holes and closed it permanently. Plug this into an automated timer with a 12 hour on/off cycle.
Step 4 – Setup Ink Bird Humidistat
First, calibrate the Ink Bird humidistat in line with the instruction inside the box.
Once complete, pop the relay of the Humidistat through the vent hole which your light wiring is going through and plug into a plug. Set the ink bird humidistat to come on when the RH drops lower than what is required.
Step 5 – Assemble rack inside the tent
Now that you have the wiring sorted set up the mesh shelving rack inside the grow tent. This is pretty self-explanatory. Pour a layer of perlite on the bottom of the grow tent.
Step 6 – Setup Humidifier – Attach the hose to the top of the humidifier in a position then close the vent around the hose. Plug the humidifier into the Ink Bird humidistat and test it out.
Step 7 – Add Exhaust Fan
Add a waterproof fan to one of the vents in the grow tent. Pull the vent around it so it sits snug around the fan. Set this to come on every 2 hours or so. This will provide some fresh air to the fruiting chamber however it will not be enough to grow Oyster mushrooms as they require lots of oxygen. The air inside your home is rich in Co2 so you will be replacing it with less CO2 dense air. Plenty of other species can be grown though as I've covered here.
Step 8- Leave the zip at the bottom slight open so fresh air is pulled into the tent with the negative pressure of the exhaust fan.
How to Provide a Martha Fruiting Tent with Fresh Air Exchange (FAE).
To provide the martha fruiting chamber with FAE I have multiple cut 6-8 inch gaps in the side and top of the greenhouse. This will provide enough FAE for the mushroom growth whilst also retaining humidity.
Normally fully colonised substrates are resilient against contamination so you do not have to worry about keeping the inside of the martha a “sterile space”. Alongside this, providing plenty of FAE will reduce the chance of the most mushroom eating fungi from growing.
Alternatively, you can also vent air from outside using a window with a proper inline ducting system like this and then plug the ducting with a hepa filter like this to grow Oyster mushrooms with clean air.
However I don't do this. I have had success by just placing my Oysters outside during daylight hours then leaving them inside the martha overnight but its an idea I'd thought about.
Some people like to attach outlet/inlet fans to the build for these reasons.
- To provide the greenhouse with sterile fresh air exchange often co-opted with a HEPA filter or similar to provide sterile air into the greenhouse. This is may be done to vent fresh oxygenated air from outside.
- To exhaust CO2 rich air or spore loads out of the greenhouse to an appropriate location.
How to Clean a Martha Greenhouse?
There are a few options here:
- Wipe down the inside of the greenhouse with antibacterial wipes or alcohol to sterilize the surfaces.
OR
- Place some hydrogen peroxide into your humidifier (about one or two tablespoons). Then run the humidifier; this will disinfect the surfaces similarly to wiping them down with antibacterial wipes.
Recommended Mushroom Humidity Controllers?
I previously used a Ink Bird Humidistat for mushroom growing.
This would trigger turning on your humidifier when it has detected that the humidity inside the greenhouse has dropped below a certain level. In the end, this broke due to the constant 90+% humidity levels.
These days I have an automated timer setup that comes on for 10-15 minutes every 2 hours then shuts off. This has worked well for me and creates a satisfactory level of automation.
Is It Possible to Use a Grow Tent for a Martha Tek?
Yes!
However you will have to install additional lighting to provide the mushrooms with adequate light. Alongside this, the lighting will need to be waterproof to ensure that when the tent is at 90+% humidity they do not break and short your electricity.
Martha Tek vs Monotub
If you are at serious about growing mushrooms I would definitely build a martha greenhouse. It is far more versatile than a monotub.
Don't get me wrong monotubs are great (especially if you have them dialed in) but the species of mushrooms you can grow within them is limited.
Martha greenhouses on the other hand can handle a vast array of gourmet mushrooms.
Monotubs are great for beginners who are just learning the basics and don't want to commit to giving their new hobby too much space.
A small boxed environment to control and grow within can be a rewarding experience. Checkout my post on how I make my monotubs here.
What Strains can be Grown Inside a Martha Chamber?
This is dependent on your setup, if you can provide fresh oxygen to your greenhouse then you can pretty much grow anything. However if you are building one similar to the one described above here are a few species:
- King Oysters.
- Lion's Mane Mushroom.
- Turkey Tail.
- Shiitake.
- Nameko Mushrooms.
- Reishi.
- Elm Oyster.
- Pioppino.
- Enoki.
My Dream Martha Fruiting Chamber Setup.
This is the setup I would build if I had plenty of space and money to blow on a fruiting chamber. This is something I hope to one day build but at the moment it is just some food for thought.
Here we go:
Large Grow tent.
A large grow tent like this, however a greenhouse like this would also work, but I would be more inclined to use the proper grow tent as it is fully enclosed and would require no modification.
Shelving.
I would get some proper heavy duty shelving like this with wheels so I could move things around easily if I wanted too.
TIP: Also, make sure the shelving is wired so heat can escape from the substrate bags.
Inline Fan.
I would use an inline fan like this with ducting to pull fresh air from outside and have it filter through a HEPA filter using one of these.
Lighting.
I would use the same IP67 LED lights discussed above.
Exhaust Fan.
This would be to cycle CO2 out of the grow tent and I would probably use the fan the same again as the inline fan.
Large Humidifier.
I would probably build a house of hydro tote as seen here. A lot of farmers I see are currently using these and they have a really good reputation.
And that's it. I wouldn't want anything too huge yet but just a few shelving systems and a method to bring filtered oxygen into the tent from outside so I could get some huge Oyster caps.
One thought on “How to Make a Martha tek Fruiting Chamber.”
Great article, thank you so much for sharing! It is especially helpful that different set-ups were detailed thoroughly. Perhaps the best Martha Tent guide I have seen!