How To Maintain & Manage Liquid Culture Syringes.
Store liquid culture syringes in the refrigerator at 2-4°C upon arrival. Place the syringes in a small, dedicated compartment at the top of the door section of your refrigerator.
This area is often slightly warmer than the rest of the fridge (2-4°C), providing an ideal environment for storing your cultures without risking them becoming too cold. Keep the syringes inside the ziplock bags they are provided in. They can be kept like this for up to 12 months.
Avoid refrigerating syringes containing Pink Oyster mycelium, as cold storage kills this strain.
To extend the life of your liquid culture syringes and maximise their potential in your mushroom cultivation projects use the Master Liquid Culture Syringes technique I describe below.
The Master Syringe Technique.
This technique revolves around using and storing your liquid culture syringes as “master syringes.” It offers several compelling benefits:
- Space-saving: Compact storage in your fridge.
- Longevity: Extends the viable life of your liquid cultures by keeping them in a cold, dark place.
- Cost-effective: Reduces the need for frequent purchases.
- Quality Assurance: Allows for easy viability testing.
This method involves using and storing your liquid culture syringes in proper storage conditions in the small compartment at the top of your fridge, wrapped in bubble wrap or a ziplock bag, only ever using a very small amount to seed a spawn run.
Liquid culture should be expanded from the syringe and then used within a limited time span (1-2 weeks).
Utilising the liquid culture soon after expansion from its preserved state ensures it retains its vigour and dynamism, leading to more effective spawn runs. This approach contrasts with long-term storage of a jar at room temperature, which may result in diminished vitality. The liquid culture jar is solely for rapid expansion of the culture, not for its storage or preservation.
Step By Step Guide.
This is a brief outline of the steps, however the video at the top of this page will give you a deeper discussion.
1. Proper Storage:
- Store syringes in the top compartment of your fridge, which is slightly warmer, preventing the cultures from becoming too cold.
- The fridge is mostly a dark place intermittent light which is preserving.
- Wrap in bubble wrap or a Ziplock bag to safeguard from temperature fluctuations and contaminants.
2. Create Agar:
- Combine 10g of Agar, 15g of Light Malt Extract, and optional food colouring with 500ml of water.
- Heat the mixture until it begins to boil and the agar fully dissolves (this is when the agar is activated)..
- Pour into polypropylene pots.
- Sterilize in a pressure cooker at 15 psi for 20 minutes to eliminate contaminants.
3. Inoculating Agar:
- Introduce a minuscule amount from the master syringe onto the surface of the agar in a sterile environment, such as a still air box or laminar flow hood, to avoid contamination.
- Allow the agar to incubate at an optimal temperature (usually between 18-21°C for most species) for 7-14 days until fully colonised.
4. Preparing Liquid Culture Jar / Master Grain Jar:
- Dissolve 1.6g of Light Malt Extract in 1L of water. For additional clarity and to remove particulates, filter the solution through a muslin cloth or a coffee filter into jars.
- Sterilise the solution in sealed jars at 15 psi for 20-30 minutes.
- Ensure the jars cool down in the pressure cooker to room temperature before use.
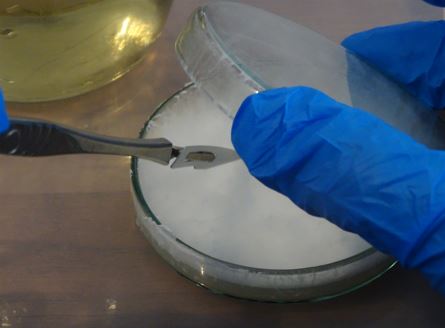
5. Inoculating Liquid Culture Jar with Agar:
- Ensure both the sterilised liquid culture jar and the colonised agar are transferred into a prepared still air box to maintain a sterile working environment.
- Prepare your tools by assembling a sterile scalpel. This will be used to carefully cut and transfer the mycelium.
- Use the sterile scalpel to cut a small piece of mycelium-laden tissue from the agar. Then, aseptically transfer this piece into the liquid culture jar. This step requires precision and care to avoid contamination.
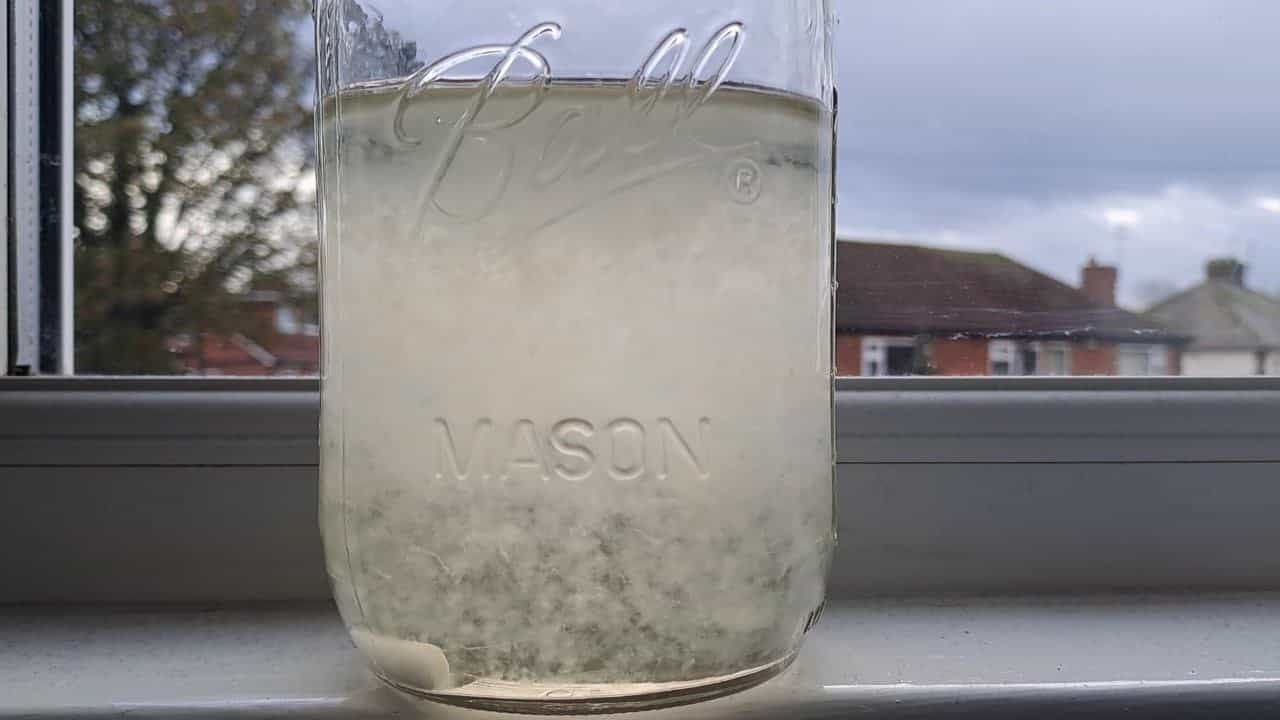
- After inoculation, place the liquid culture jar on a stir plate to ensure the mycelium is evenly distributed and remains in suspension. This aids in faster and more uniform colonisation. Use the stir plate daily for 10 to 14 days, keeping an eye on the culture's growth.
- Once the liquid culture is fully colonised and teeming with healthy mycelium, it's ready to be used. The entire jar should be utilised to inoculate grain spawn, aiming to do so in one comprehensive run. This maximises the use of your freshly expanded culture, ensuring high vitality and effectiveness in your spawn runs.
FAQs:
- How long do liquid cultures last in the fridge? Liquid cultures, except Pink Oyster, last over 6-12 months in the fridge when stored correctly. Ensure they're kept away from freezing or hot temperatures to maintain their viability. The top shelf of the door of the fridge is the best place to put them.
- What if I spot contamination? It's crucial to discard any contaminated cultures to prevent spreading. You will most likely see contamination after the agar inoculation, if you are skilled you can transfer tissue away to a second agar plate saving the culture.
- Can I do this with a Spore Syringe? Yes in fact this is the recommended method for using a spore syringe since they are often less sterile and should be tested on agar first.
Conclusion
Hopefully this guide has taught you how to properly maintain and manage liquid culture syringes.
By following these techniques, you not only ensure a continuous supply of your favourite mushroom cultures but also contribute to a more sustainable and cost-effective approach to mushroom cultivation.
Whether you’re a seasoned mycologist or a hobbyist starting out, the master syringe technique is a valuable practice for managing your liquid culture collection.


One thought on “How To Maintain & Manage Liquid Culture Syringes.”
Seems like adding a self healing port to the agar lid would eliminate the need for a still air box.