
How to Prepare Wheat or Rye Grain Spawn.
Wheat and Rye grains share so much in their preparation that it hardly warrants segregating them into distinct posts. The sole factor influencing your choice between the two hinges on your geographical location, where one may prove more cost-effective than the other.
Both of these grains when used a grain spawn boast an outstanding reputation for their utility, primarily due to their substantial nutrient content. This rich nutrient profile, in turn, translates into superior yields during the fruiting stage.
Advantages.
- Holds lots of water – for the size of these grains can hold a lot of water, the berries can swell 3X normal size or larger without bursting.
- Highly Nutritious – this grain holds high levels of magnesium, B vitamins, copper and proteins that most other grains.
- Large Surface Area – as discussed earlier due to the size of the grain, more kernels can be fit into a smaller sterilisation chamber. As a result, there is a large surface area from your inoculated spawn to grow from inside the bulk substrate. This also means less goes a long way when creating grain spawn.
- Widely Available – it is easy to purchase these grains online as it is used for artisan organic cooking, get some here.
Disadvantages.
- Cost – These grains can be costly in places as it is a popular product in organic food stores. Cheapest you will find them is at a bird feed store.
- Drying out – these grains tend to dry out easier than other grains which can cause troubles during a spawn run.
- Preparation time – these grains need an overnight soak to germinate the endospores which may be found on the grains and a wash to remove debris from the grains.
How To Prepare Wheat / Rye Grain.
Requirements
- Wheat or Rye Grain (obviously).
- Pressure Cooker.
- Mason Jars (with modified lids).
- Baking Tray.
- Sieve.
- Foil.
Summary
- Step 1: Rinse and wash grain thoroughly dust and floaters are removed. Drained water until it is no longer discolored.
- Step 2: Soak Grains in water for 12-24 hours.
- Step 3: Simmer the grains for 10-20 mins.
- Step 4: Drain off water/grain in a colander and allow excess moisture to evaporate off the kernels until they are dry to touch (the colour will lighten when ready).
- Step 5: Load the grains into mason jars and sterilize at 15psi for 90 minutes minimum.
Step 1 – Measure out Grain.
Measure out how much grain you want into a large box or bucket. Normally 800ml of grain will make 2 x 400ml jars once hydrated so take this into consideration.
Step 2 – Rinse and Wash Grain.
Wash the grain under a tap to wash away any debris and dirt which is inside the grain. Make sure to mix up the grain and ensure the run-off water is clear before moving onto the next step.
This is important to keep the grains from sticking too much when colonised.
Step 3 – Soak Grain in Water.
Take the cleaned grain kernels and soak them in a container or bucet of water overnight, this will allow endospores to germinate making them more susceptible to sterilization.
It also reduces the simmering time in the next step.
Step 4 – Simmer The Grains For 10-20mins.
Take the soaked grain and heat them in water, then allow grains to simmer for around 10-20 minutes. Wait until the grains have swelled up doubling in size at least.
Step 5 – Drain Grain and Dry.
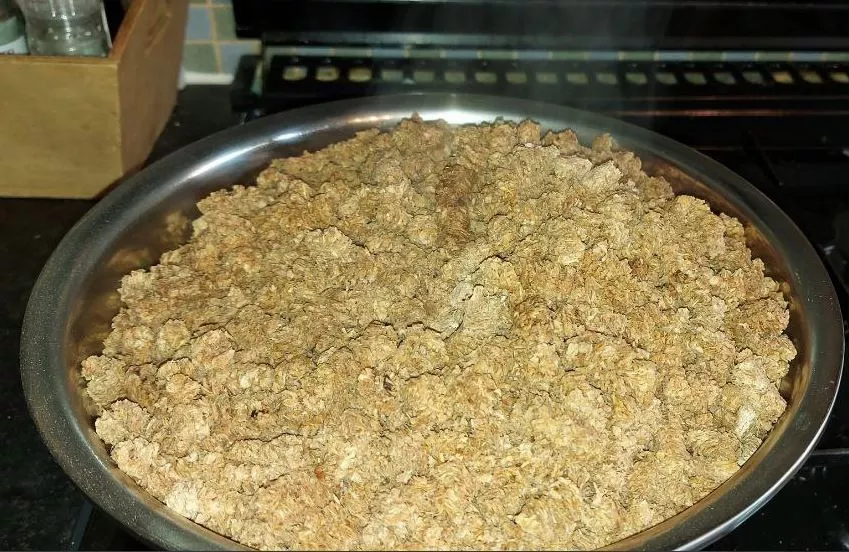
After the grain has been cooked and is hydrated, allow it to dry out on a large surface (get multiple large sieves). Because the grain is hot coming out of the boiling pot the water should evaporate off the surface of the kernels. Make sure to spread the kernels out and move them around regularly to ensure that all sides are dry.
The grain should be dry to touch but still swollen on the inside when complete, this is important as if the grain is too wet it could cause issues.
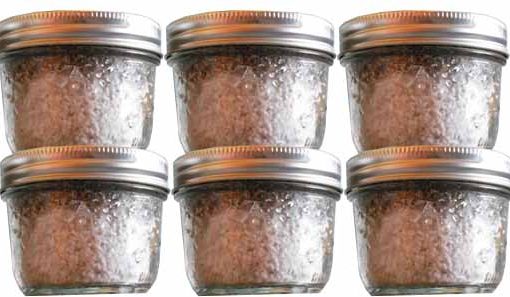
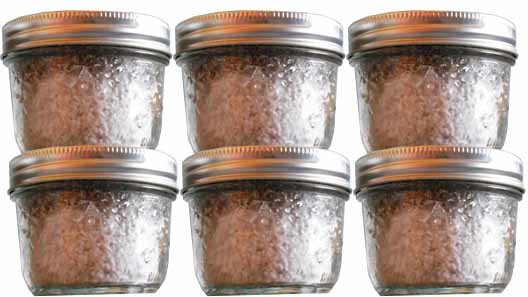
Step 6 – Load Grain into Jars.
Next, take the swollen kernels and place them into your mason jars ready for sterilization.
Sterilize at 90+ minutes inside your pressure cooker at 15PSI. When sterilization is complete allow the pressure cooker to cool down fully ( i leave it overnight normally) before removing the grains.
Can I Add Coffee Grounds into Wheat/ Rye Grain prep?
Yes! Coffee can be added into the mix during step 3 to increase nitrogen in the grain spawn and increase colonization times.
However, make sure you have done a few runs of non supplemented grain jars before adding coffee grounds as often the introduction of coffee creates more contamination factors inside the jars.
