

How To Grow Blue Oyster Mushrooms.
Blue Oyster mushrooms, known scientifically as Pleurotus ostreatus var. columbinus, are prized for their exquisite taste, impressive yields, and beautiful blue-hued appearance. If you're intrigued by the idea of growing your own, you're in for a treat as they are very easy to grow as long as you have a small outdoor space (driveway, window ledge, garden, similar).
These mushrooms have a fast growth rate and a versatile nature, making them ideal for beginners. Their preference for cooler temperatures gives them an edge in colder climates.
A key requirement when growing Blue Oyster Mushrooms is near-constant fresh air exchange, in order to activate initial growth. This, plus their love of high humidity, means that they are perfect candidates for growing outdoors.
Growing Blue Oyster mushrooms can be an incredibly rewarding experience, both culinary and therapeutically.
The sense of accomplishment when harvesting your own mushrooms is unparalleled.
Here's a comprehensive guide to help you get started.
Growing Parameters for Blue Oyster Cultivation.
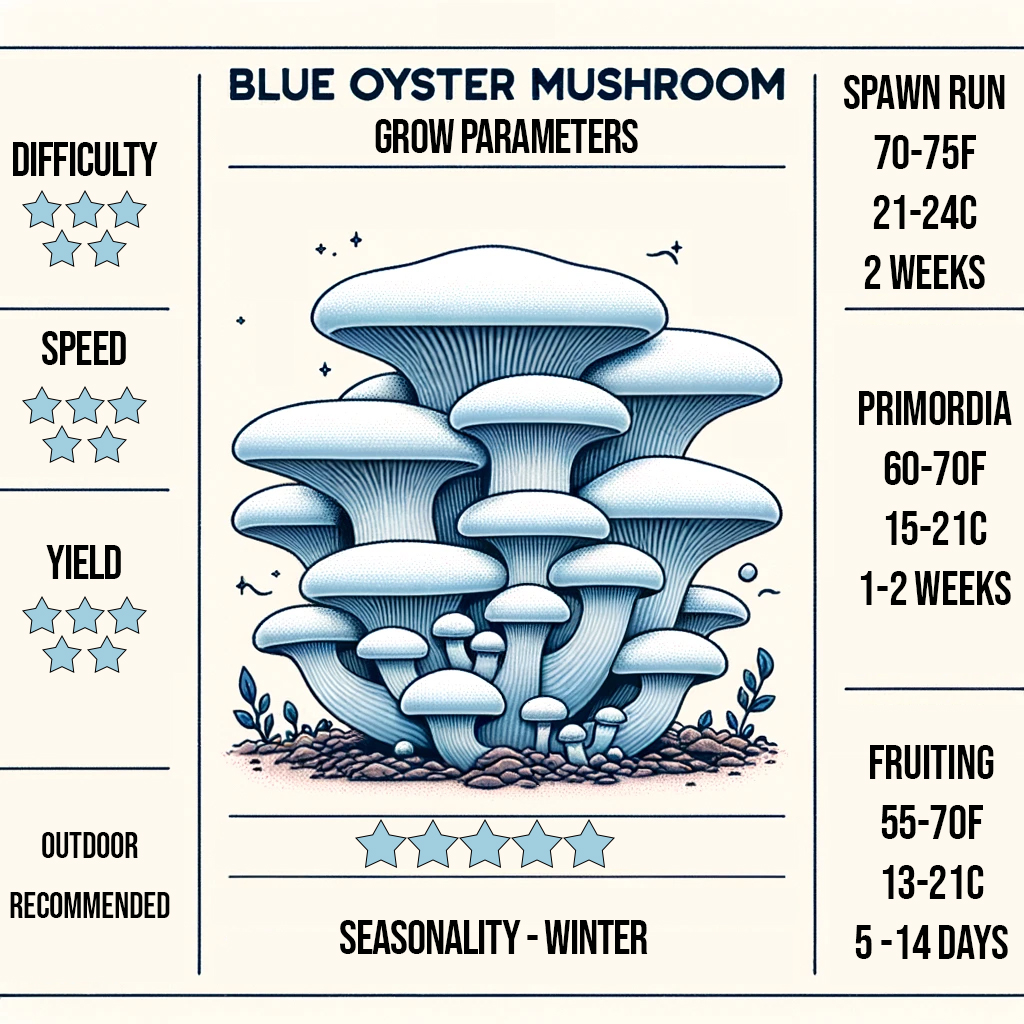
Difficulty – ★★★★★ Speed – ★★★★★ Yield – ★★★★
- Spawn Run: 70-75°F (21-24°C). This is the initial phase where the mycelium colonizes the substrate. It requires a consistent temperature and lasts for about 2 weeks.
- Primordia Formation: 60-70°F (15-21°C). This stage involves the formation of small mushroom pins and benefits from slightly reduced temperatures.
- Fruiting: 55-70°F (13-21°C). This phase is the final stretch where the mushrooms mature. It requires fresh air, light, and lasts between 5-10 but could take up to 14 days if conditions are not stable.
- Difficulty level: Easy with outdoor cultivation.
- Seasonality – Winter.
Substrates Selection.
Blue Oysters are versatile and can grow on a range of substrates, including straw, hardwood sawdust, and supplemented wood pellets.
If using straw, ensure it's chopped into small pieces. This can be done using a garden strimmer and a bucket.
For a nutrient boost, consider adding coffee grounds or wheat bran to but be warned this will increase contamination rates and probably isn't worth it for the average hobbyist.
Indoor vs. Outdoor
Indoor requires an oxygen rich regulated environment, outdoor is easy and perfect for the average mycologist when in season.
Growing techniques:
- Bags: Used mainly for cultivation by farmers within an oxygen rich environment wherein fresh air is regulated.
- Buckets: Great for growers who have a small garden space and my favourite method due to hatred for plastic waste.
- Jars/Small Containers: While feasible, jars should be placed outdoors for fruiting. Alternative methods often yield better results due to size constraints.
- Outdoor beds: It is possible to bury wood logs and create straw or wood based beds which the mushrooms will fruit from.
Unlock the Secrets to Successful Mushroom Cultivation
Get our comprehensive instructions on mastering sterile techniques and growing mushrooms at home.
Whether you're a beginner or looking to improve your skills, this ebook has everything you need to succeed.
Learn More
Favourite Techniques for Growing Blue Oyster Mushrooms.
Step-by-step guide to Grow Blue Oyster Mushrooms In Buckets!
Outdoor Buckets inside butterfly cages is our favourite method for growing blue oyster mushrooms.
Spawn Selection.
Option 1 – Buy spawn
If you want the fastest results then purchase a high-quality Blue Oyster spawn from a reputable supplier. Grain spawn will increase your yields whilst sawdust spawn will be more contaminant resistant.
Option 2 – Create Your Own Spawn – Full guide on (how to make grain spawn).
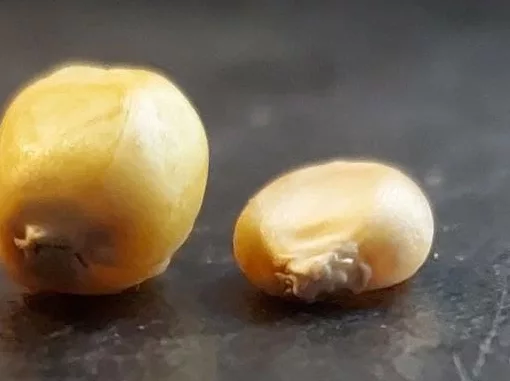
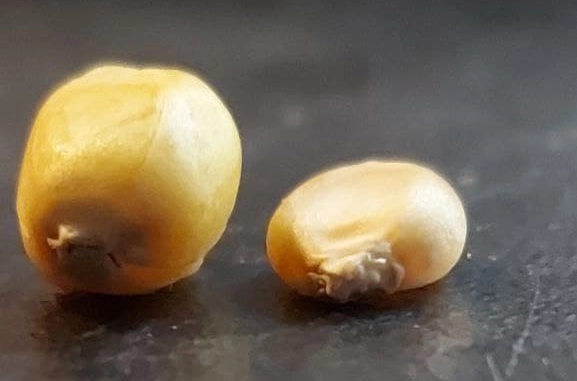
- Select a Grain: Choose a suitable grain like rye berries, wheat, or wild bird seed.
- Measure Grain: Depending on the number of jars or bags you're preparing, measure out the appropriate quantity.
- Wash and Soak: Rinse the grain thoroughly, then soak for 12-24 hours.
- Drain and Dry: After soaking, drain the grain and let it dry slightly, ensuring it's not overly wet.
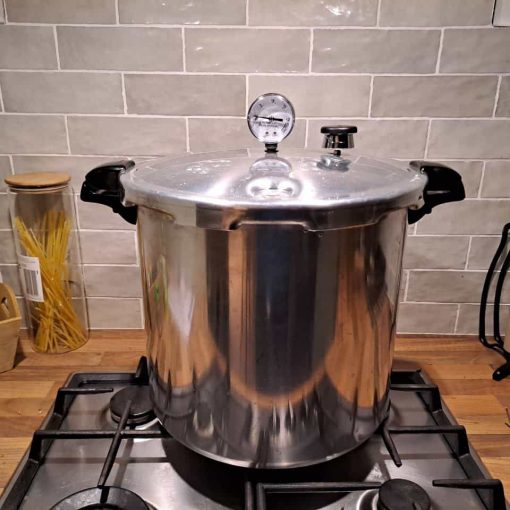
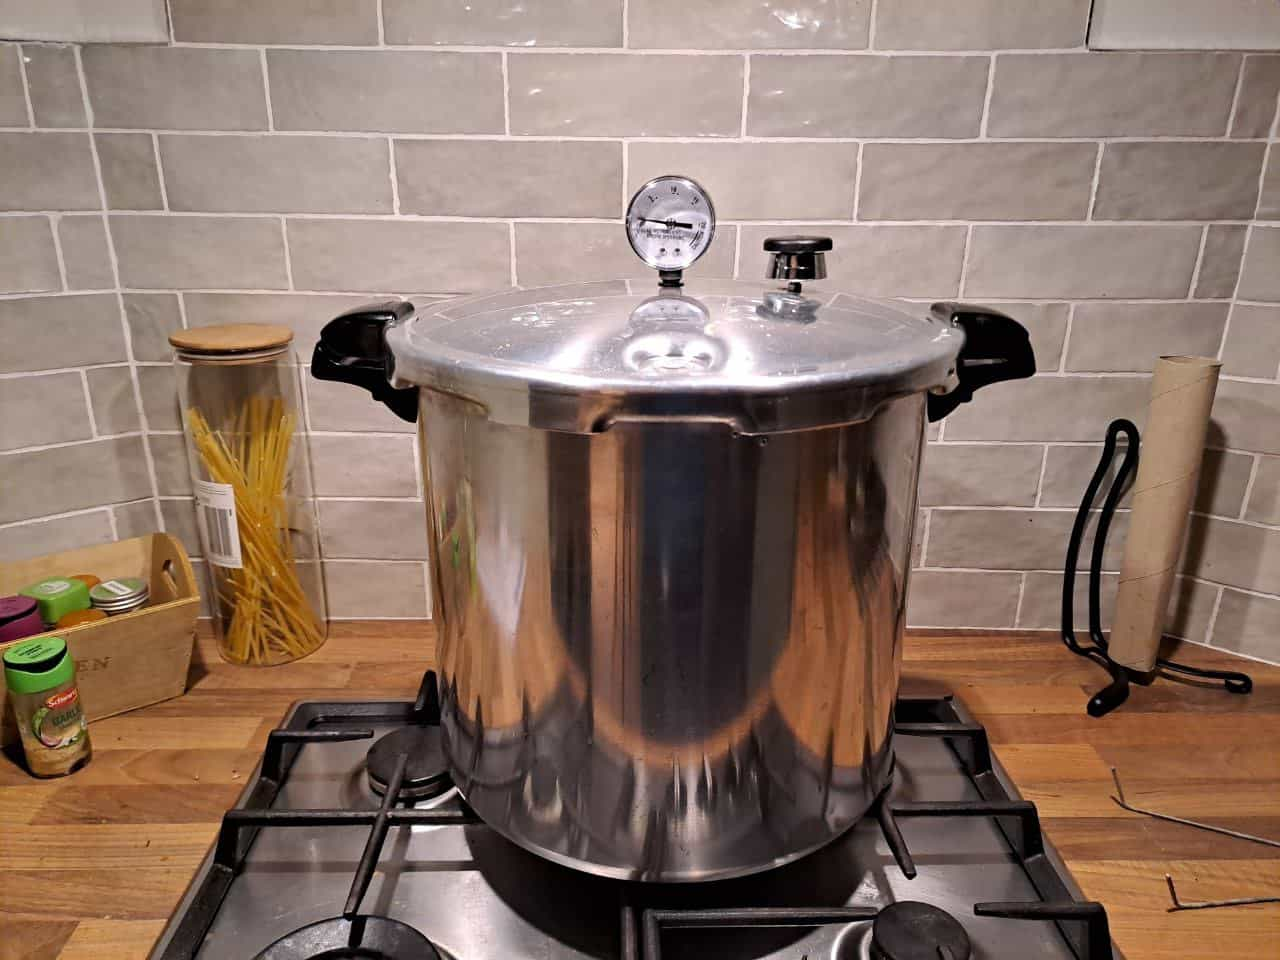
- Pressure Cook: Sterilize the grain by pressure cooking for 90 minutes at 15 psi.
- Cool Down: Allow the grain to cool to room temperature in the pressure cooker overnight.
- Inoculation: In a sterile environment, introduce your mushroom mycelium (from a culture or another spawn) to the grain.
- Shake and Mix: Gently shake the jar or bag to distribute the mycelium evenly.
- Incubate: Place in a warm, dark place to let the mycelium colonize the grain.
- Monitor Growth: Check periodically for signs of colonization and possible contamination.
- Fully Colonized Spawn: Once fully colonized, your grain spawn is ready to be introduced to a bulk substrate or used to inoculate further jars/bags.
Preparation of the Substrate.
Requirements:
- Large Stove Pot or Pressure Cooker: Essential for sterilizing the substrate and ensuring a contamination-free environment for the mycelium to colonize.
- Substrate Material: Popular choices include hardwood sawdust or straw. I will be using straw
- Old Pillowcase or similar.
- Water: To hydrate the substrate.
- Thermometer: To monitor the temperature during sterilization, get the one in the link which will beep on peak pasteurization temperatures.
- Measuring Cups: For accurate measurement of substrate and water.
- Strainer or Colander: Useful for draining any excess water post-soaking (if required).
Measure the substrate into buckets. I recommend chopping the straw with a garden trimmer for optimal results, I've found similar success without this step.
However, chopping the straw allows for a denser substrate, providing more nutrients for the mushrooms to thrive.
Thoroughly wet the straw. Soaking it for a few hours or overnight ensures the mushrooms have adequate hydration for the first flush.
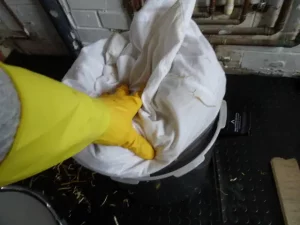
Pack the straw into a large pillow case when completed, this will keep the substrate together during pasteurization.
Heat a large pot on the stove, (I use my 23 quart presto for this) then fill with water.
Heat the water until it reaches a temperature of 150-170°F (65-77°C).
Immerse the straw into the water.
Maintain this temperature and allow the straw to pasteurize for at least 60 to 90 minutes. When the temperatures reach the upper level turn off the heat and allow it to sit.
Monitor the water temperature using a thermometer to ensure it remains in the desired range.
Once complete, turn off the heat and allow the pot to cool.
Remove the sack of straw and allow excess moisture to drip off it for an hour or 2. Once cooled, the substrate should be moist but not dripping.

If it's too wet, push down on the pillowcase to strain excess water. The straw should be damp to touch but not dripping.
Now, your substrate is ready to be inoculated with the mushroom spawn or mycelium.
Inoculation
Requirements:
- Buckets at least 5L in size with some holes drilled in the sides.
- Gloves – To maintain sterility.
- Face Mask – Optional, but helps to prevent the introduction of contaminants from breath.
- Alcohol Solution – For disinfecting tools and surfaces.
- Mushroom grain or sawdust spawn.
- Prepared substrate.
Prepare Your Workspace.
- Clean the area thoroughly. This reduces the risk of airborne contaminants.
- Wear clean gloves and a face mask and wipe gloves down with alcohol.
- Wipe down the insides of the buckets with alcohol solution.
- Tape up any holes on the bucket for now.
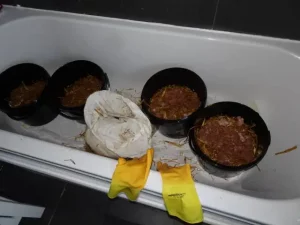
Mix the Spawn and Substrate.
- Place a layer of straw on the bottom of the bucket.
- Next add the spawn on top of the layer of straw.
- Repeat, creating a 3 inch layer of straw, then spawn, until you reach the top of the bucket, in a lasagna like fashion.

Incubation.
- Put the lid back on the bucket and wipe away any excess substrate which may be around the lid.
- Transfer the inoculated substrate to an incubation area. This should be a location with a consistent temperature 70-75°F (21-24°C).
- Leave the buckets alone for at least 14-21 days.
Monitor Growth.
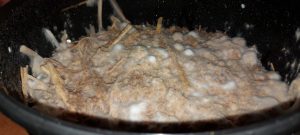
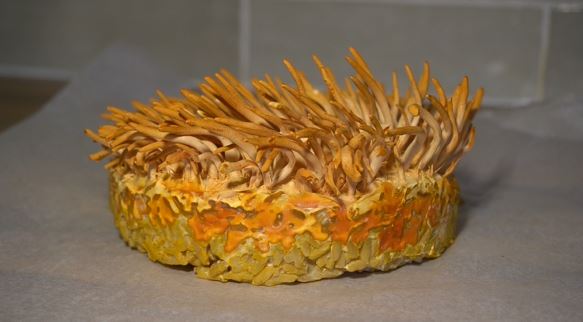
- Eventually it should be possible to see mycelium growing and running to the edge of the tape placed over the holes of the buckets.
- Look for a thick, white, web-like growth, an indicator of a healthy colonization.
Initiating the Fruiting Phase.
- Once the substrate is fully colonized, it's time to introduce your mushrooms to cooler temperatures and light, signalling them to start producing fruit bodies.
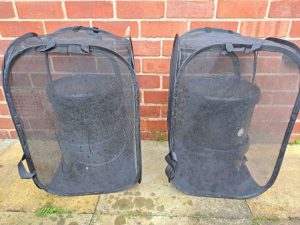
- Remove the tape from the holes of the buckets then place them outside, spray the buckets down with a hose daily if it hasn't rained.
Tip: I like to put my buckets inside a butterfly cage like this to ensure that bugs cannot reach the mycelium.
Monitoring and Care.
- Blue Oyster mushrooms grow quickly once they start fruiting. Keep an eye on them, ensuring they remain free of contaminants and pests.
- Maintain the humidity and temperature levels, misting and fanning if needed.
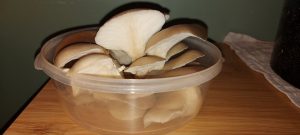
Harvesting Your Mushrooms.
- Harvesting is all about timing. For Blue Oysters, the best time is just before their caps fully uncurl.
- To harvest, gently twist the base of the mushroom cluster and pull it away from the substrate. Use a sharp knife if necessary.
- Freshly harvested Blue Oysters can be used immediately in various dishes or preserved for later use.
- For storage, keep them in a paper bag inside the refrigerator, where they can last for up to a week.
- For longer preservation, consider drying or freezing them.
Second flush.
- Dunk the blue oyster mushroom bucket inside another bucket which is full of water and leave overnight.
- The next day you should move the bucket back into the butterfly cage and wait for more flushes.
How many flushes can you get from a blue oyster bucket?
I have actually had upwards of 3 flushes from one bucket, the first two came pretty fast and tasted great. The third flush was nearly 3 or 4 months later. There was a heavy frost (I actually left my buckets out over winter) and when the frost thawed the mushrooms re-appeared.
However, these flushes were large but didn't taste as great, although I am not complaining.
Growing Blue Oyster Mushrooms In Outdoor Beds.
Preparation of the Substrate.
Materials:
- Straw (wheat or oat straw is commonly used)
- Water
- Large container or tub
Steps:
- Chop the Straw: Start by chopping the straw into smaller pieces, around 2-4 inches in length.
- This increases the surface area for mycelial growth.
- Hydrate the Straw: Fill a large container or tub with water. Immerse the straw into the water and let it soak for 24 hours. This ensures the straw is fully hydrated, which is essential for mushroom growth.
- Drain and Pasteurize: After soaking, drain the water. To reduce contaminants, pasteurize the straw by heating it to 160-175°F (71-80°C) for 1-2 hours. This can be done using a large pot or stea.
- Cooling: After pasteurization, allow the straw to cool down to room temperature.
Preparation of Beds
Materials
- Shovel
- Outdoor space (shaded area is preferable)
- Compost (optional)
Steps:
- Choose a Location: Select a location that remains relatively shaded. Direct sunlight can dry out the bed and hamper mushroom growth along with raising the temperatures out of range.
- Dig the Bed: Using a shovel, dig a trench about 4-6 inches deep. The width can be around 2 feet, and the length can vary based on how much substrate you have.
- Line the trench with cardboard.
Inoculation
Materials:
- Blue Oyster mushroom grain spawn or sawdust spawn
- Gloves
- Plastic sheet or straw mulch
Steps:
- Layering: Begin by placing a layer of the prepared straw into the trench. Add a layer of the Blue Oyster mushroom spawn on top. Aim for a ratio of about 10 parts straw to 1 part spawn.
- Alternate Layers: Continue this layering process, finishing with a straw layer on top.
- Moisture Control: Ensure the bed remains moist but not soggy. Over-watering can lead to mold growth.
- Cover: Cover the bed with a plastic sheet or straw mulch. This helps in retaining moisture and offers some protection against pests and contaminants.
- Maintenance: Check the bed regularly to ensure it remains moist. Within a few weeks, the mycelium should start colonizing the straw.
- Fruiting: When you see small mushroom pins emerging, it's an indication that your bed is ready to fruit. At this point, you can remove the plastic sheet, and ensure the bed remains moist.
- Harvest: Blue Oyster mushrooms grow quickly once they start fruiting. Harvest them when the caps are still slightly curled downwards for the best texture and taste.
By following these steps and ensuring that the bed remains moist and free from contaminants, you'll be able to enjoy fresh, home-grown Blue Oyster mushrooms right from your backyard.
What do Blue Oyster Mushrooms taste like?
A good substitute for meat, Blue Oyster Mushrooms can be served in soups, sauted, fried in butter with garlic and herbs, or simply served on their own. Their thick and meaty flesh gives them a rich and distinctive taste, with a slight kick of anise.
They are ideal for grilling as mushroom steaks, and some Central European cuisines use them in stews in place of meat.
Blue Oyster Mushrooms are best eaten young, as their flesh toughens with age, and can become sour in taste. The stems can also be tough and chewy, and you may be best just sticking to the cap for your meal.
There are many recognized medicinal benefits of eating Blue Oyster Mushrooms. They boast a high protein content, as well as numerous B vitamins, essential amino acids, antioxidants, and vitamins and minerals. Studies have shown they can play a role in reducing both tumor sizes and inflammation throughout the body, as well as treating high cholesterol.
The development of plaque in major arteries can also be reduced by introducing Blue Oyster Mushrooms to your diet.
Are Blue Oyster Mushrooms Low Fodmap?
Yes! Blue Oyster Mushrooms are considered a low fodmap food source.
Are Blue Oyster Mushrooms Hallucinogenic or Psychedelic?
No, Blue Oyster Mushrooms do not contain any psychedelic substances.
Conclusion.
In conclusion, cultivating Blue Oyster mushrooms at home is an endeavour that pays off in spades, offering a bounty of fresh, delicious mushrooms, and the unmatched satisfaction of growing your own food.
With a bit of patience, care, and attention to detail, you'll be a seasoned mycologist in no time!

