
How To Make Liquid Culture For Mushroom Cultivation.
Making liquid culture at home can cut your mushroom cultivation time by up to two weeks while reducing your costs massively. This nutrient rich solution containing live mushroom mycelium suspended in sterilized sugar water has become the preferred method for serious home cultivators looking to grow mushrooms more efficiently.
Unlike spore syringes that require germination time and carry higher contamination risks, liquid culture provides immediate colonization power that dramatically accelerates your entire growing process. A single homemade culture can inoculate dozens of grain jars, making it an essential skill for anyone serious about cultivating mushrooms at scale.
Key Takeaways
- Liquid culture accelerates mushroom colonization by 7-14 days compared to spore syringes.
- Uses simple ingredients: 4% sugar solution (24g per 600ml water) with light malt extract or honey.
- Requires pressure cooker sterilization at 15 PSI for 20 minutes to eliminate contaminants.
- Healthy cultures show white wispy mycelium growth within 3-5 days from transfers.
- Shelf life of 6-12 months refrigerated, best used within 1-2 months for optimal results.
- Reduces contamination risk and enables cost-effective grain spawn production at home.
Unlock the Secrets to Successful Mushroom Cultivation
Get our comprehensive instructions on mastering sterile techniques and growing mushrooms at home. Whether you're a beginner or looking to improve your skills, our ebook has everything you need to succeed.Learn More
Step-by-Step Liquid Culture Preparation
The process of making liquid culture follows a precise sequence that prioritizes sterility while optimizing conditions for mycelium growth. Each step builds upon previous preparations, creating multiple safeguards against contamination throughout the procedure.
Requirements
- Pressure Cooker (pressure cookers for mushroom cultivation).
- Micro-pore tape/polyfill (here is a discussion on gas exchange lids, however for this tutorial micropore tape will do).
- Liquid Culture Syringe
- Nutrient (Honey, LME, Karo).
- Butane Torch (seriously get one of these it makes flame sterilizing needles very very easy, the needle will glow red in seconds).
- Jars
- Alcohol
- Stirring plate (this will speed up the process).
Mixing the Nutrient Solution
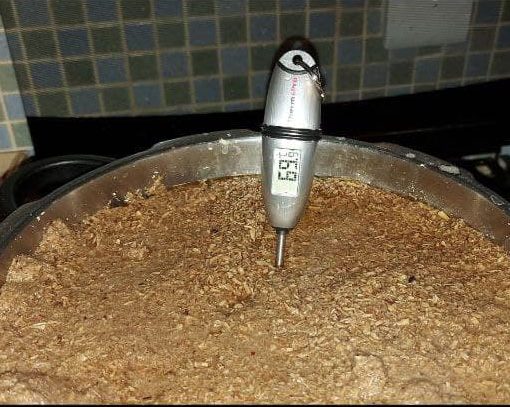
Begin by measuring out the nutrient water mixture as per the table below. Use warm distilled water to accelerate dissolving and prevent crystallization that could harbor contaminants. Stir thoroughly until completely dissolved, ensuring no sediment remains that might interfere with sterilization effectiveness.
Add a magnetic stir bar or clean glass marble to each jar before filling. These agitation aids prove essential for maintaining homogeneous mycelial distribution without opening containers during incubation. The mixture should appear clear to slightly amber depending on malt extract type.
Strain the completed solution through coffee filters to remove any undissolved particles. This filtering step prevents sediment accumulation that creates contamination risks during long-term storage. The final mixture should flow smoothly without visible debris.
| Recipe Name | Nutrient Amount (Grams) | Water | Percentage (NA:W) |
|---|---|---|---|
| Karo LC | 24g | 600ml | 4% |
| Honey LC | 24g | 600ml | 4% |
| LME LC | 1g | 600ml | 0.16667% |
Jar Preparation and Sterilization
Fill prepared jars leaving 2-3 inches of headspace to accommodate expansion during sterilization. Install airport lids finger-tight, avoiding over-tightening that might prevent proper venting. Cover each jar with aluminum foil to prevent moisture infiltration during the pressure cook cycle.
Load the pressure cooker with 2-3 inches of water according to manufacturer specifications. Arrange jars to ensure steam circulation around all surfaces. Avoid stacking or overcrowding that might create uneven heating patterns.
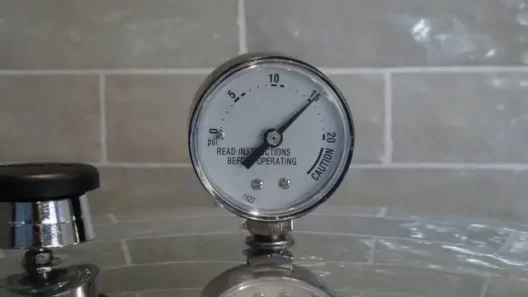
Sterilize at exactly 15 PSI for 20 minutes, monitoring pressure gauge throughout the cycle. Timing begins only after reaching full pressure, not when heat application starts. Allow natural cooling for minimum 12 hours – rapid cooling creates vacuum effects that can draw contaminants through compromised seals.


Inoculation Process
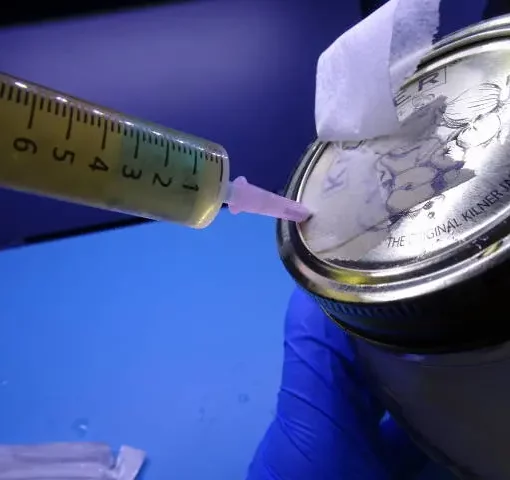
Prepare a clean workspace using 70% isopropyl alcohol on all surfaces. Work quickly but deliberately to minimize contamination exposure during inoculation procedures. Flame sterilize syringe needles until red-hot.
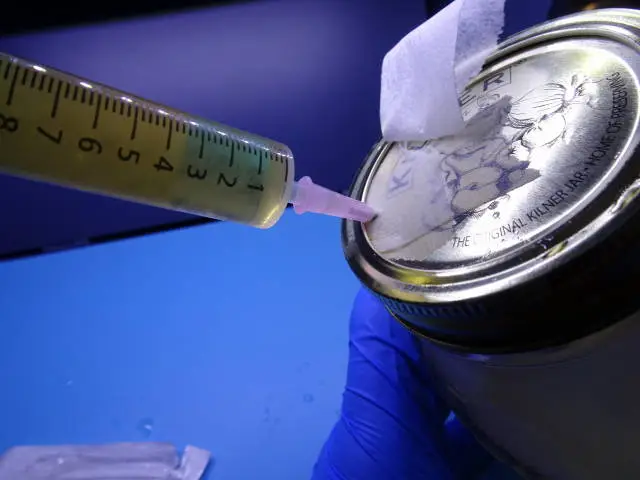
Inject 1-4ml of starter culture through the self healing injection port
Document inoculation date, source material, and mushroom species for tracking purposes. Proper labeling prevents confusion when managing multiple cultures simultaneously and enables accurate timeline monitoring.

Incubation and Growth Management
Successful liquid culture development requires precise environmental conditions that optimize mycelium growth while preventing contamination proliferation. Temperature control, lighting conditions, and agitation frequency directly impact both growth rates and final culture quality.
Environmental Conditions
Maintain consistent temperatures between 21-26°C (70-80°F) throughout the incubation period. Most mushroom species thrive within this range, though specific varieties may prefer narrower temperature windows. Higher temperatures accelerate bacterial growth more than mycelial development, increasing contamination risks significantly.
Store cultures in complete darkness during active growth phases. Light exposure can trigger premature fruiting responses that alter mycelial characteristics and reduce culture viability. A dark place like a closet or basement provides ideal conditions for sustained mycelium growth.
Monitor ambient humidity around storage areas, though this factor impacts culture development less than temperature and lighting. Excessive moisture can compromise lid seals and create condensation that facilitates contamination entry.
Agitation and Growth Monitoring
Daily agitation prevents mycelium clumping while promoting even nutrient distribution throughout the solution. Manual swirling for 10-15 seconds proves sufficient for most applications, though magnetic stir plates provide superior consistency for serious cultivators managing multiple cultures.
Growth timeline expectations vary by inoculation source. Transfers from existing liquid culture or agar plates typically show visible mycelium within 3-5 days, while spore inoculations require 7-14 days before significant growth appears. Healthy cultures develop white, wispy mycelium clouds that break apart easily with gentle agitation.
Document growth progress through regular visual inspections, noting color changes, growth density, and any unusual characteristics. This monitoring enables early contamination detection while building experience for future culture assessment.
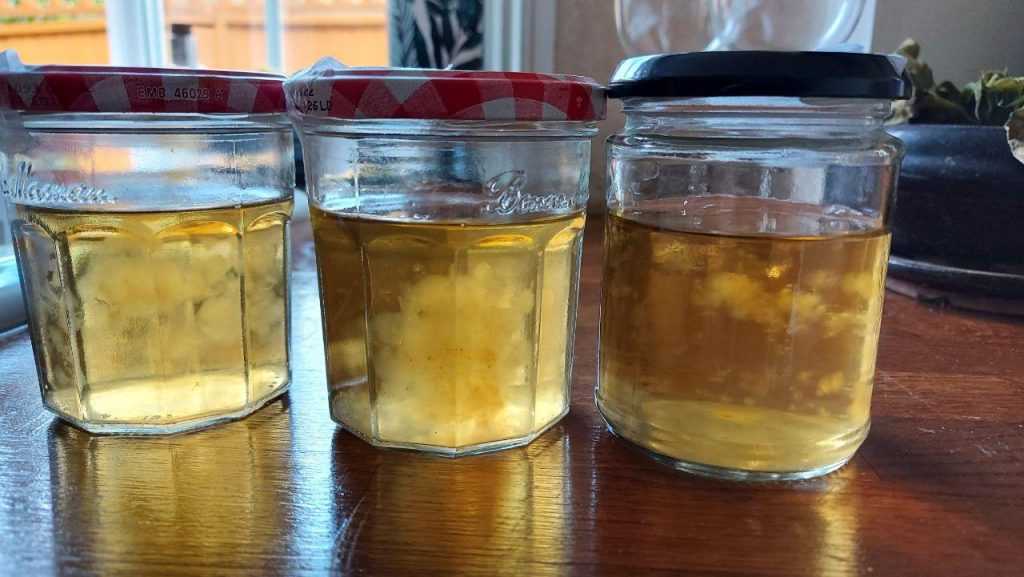
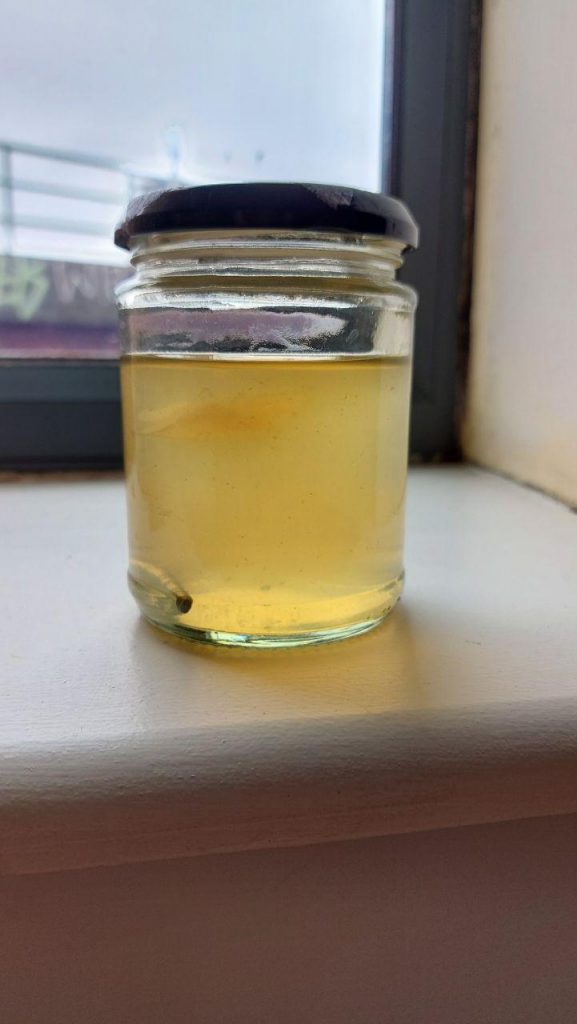
What Does Good/Bad Liquid Culture Look Like?
Good Culture
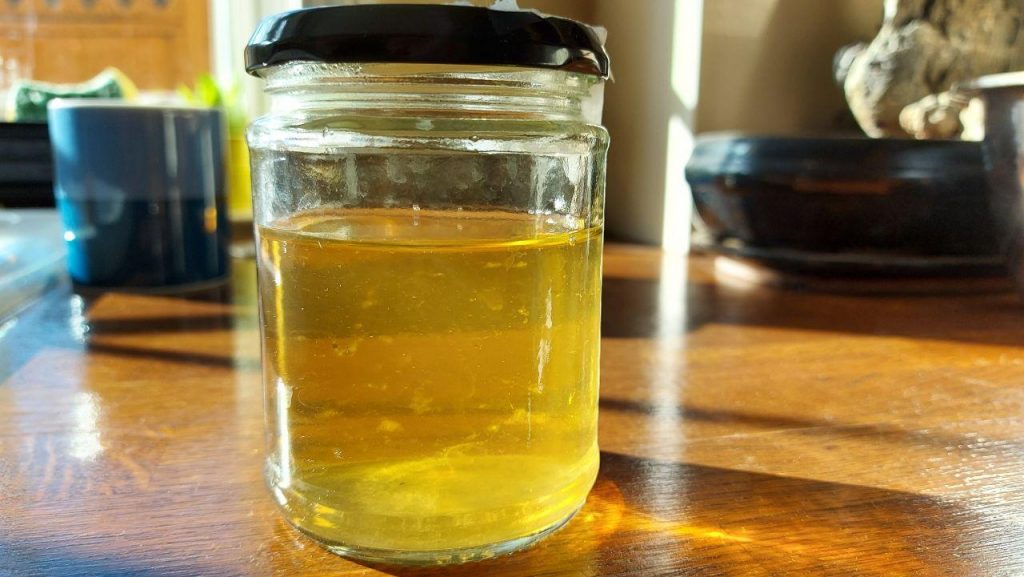
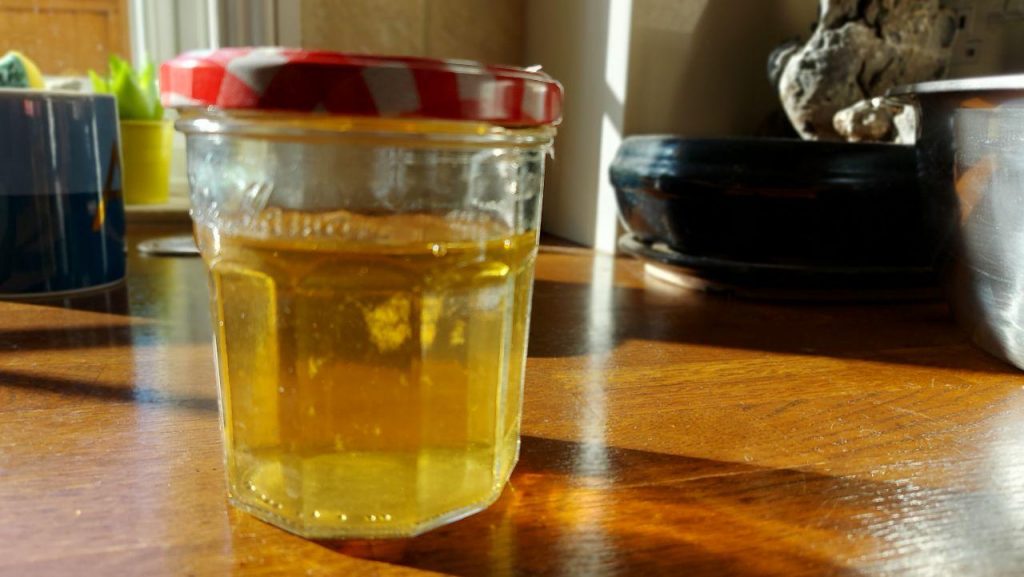
The liquid should be clear and you should be able to see through to the other side of the jar. Inside the liquid, there should be a white clump of mycelium or lots of little clumps.

Bad Culture
Common signs of contamination are if the culture is cloudy and you cannot see through it (wait a week after inoculation to check this as sometimes the mycelium cleans up the culture), if it releases a foul smell or has a green colour scum on the top of the culture when it is left to settle for a few days.
Normally the best way to find out if the culture is clean is to try it out on grain or agar and see if it contaminates. If you follow sterile technique but the jars are repeatedly being contaminated in the same way it’s likely your jar of liquid culture.
Benefits Of Liquid Culture?
- Faster Growth – Since the medium already contains live mycelium it normally colonises a substrate substantially faster. This gives LC an advantage over spores.
- Unlimited Mycelium Supply – if you learn how to make liquid culture you can turn 1 LC syringe into an unlimited supply. However, you must take senescence into consideration (so use a master jar).
- It’s Cheap – making liquid cultures is very cheap and can be done with household ingredients.
Does Liquid Culture Need Gas Exchange?
No, Liquid culture does not need gas exchange. The mycelium is submerged in a liquid solution therefore there is no need to for air exchange holes to be placed in your lid. However, if you don't have a gas exchange hole you wont be able to pull the solution into the syringe.
Does Making A Liquid Culture Require A Pressure Cooker?
Actually, no, you can sterilize the liquid culture recipe in a microwave if you don’t have a pressure cooker.
Place your mixture into a microwavable container, the put it inside the microwave for 3 minutes, remove and shake, then place it in for another 3 minutes.
How Long Does Liquid Culture Last?
Liquid Culture can survive at room temperature for 6 months until the nutrients in the solution have been used up.
So you're Liquid culture is good for a decent amount of time suspended in the solution
If you need to your liquid culture to last longer putting it into a refrigerator should allow it to survive for years.
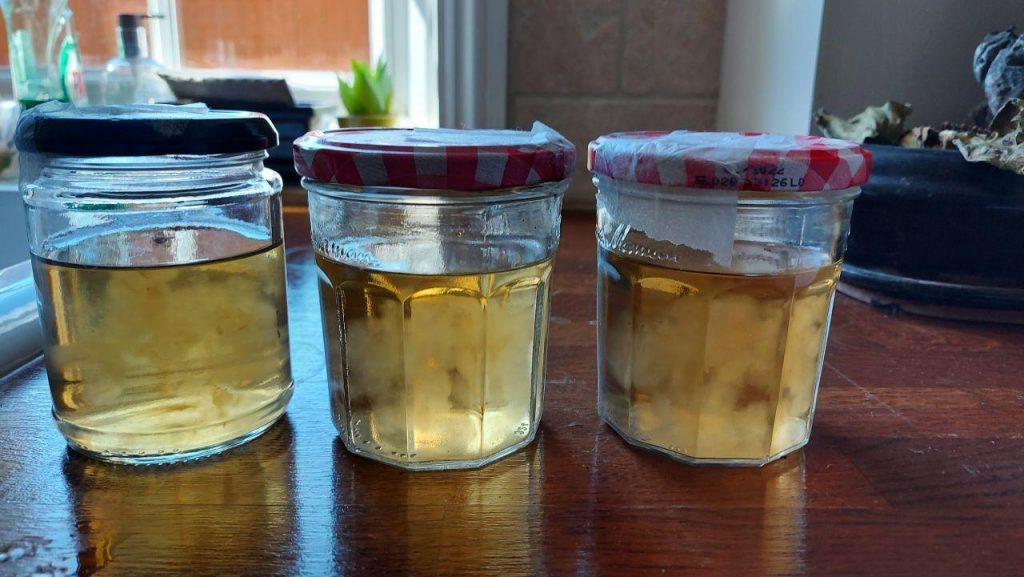
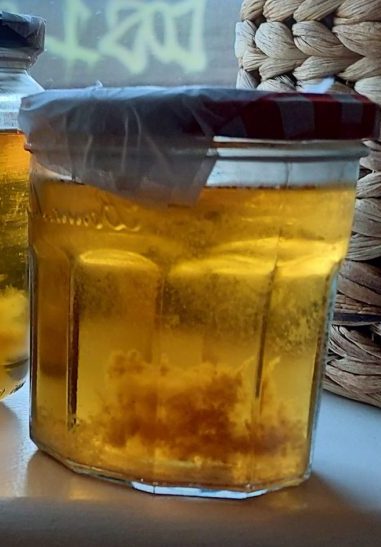
When to Stir/Shake Liquid Culture?
It is recommended to shake or stir (using a magnetic stirrer like this) at least once a day.
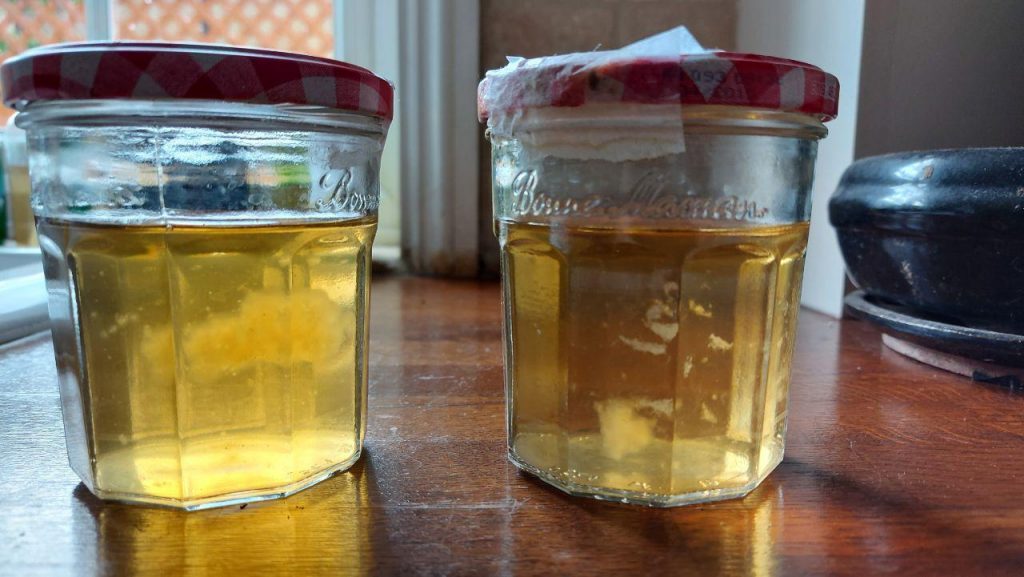
If you don't do this the mycelium will create a huge blobby mass as seen below.
This also speeds up the expanding process as there is more surface area for the mycelium to grow off.
I did not shake those Jars so I could highlight what a clean culture would look like (clear).
How Long Does Colonization Take?
Liquid culture usually takes between 7-14 days to accumulate enough mass to be used in an actual inoculation.
It can take longer for the Jar to be completely colonized and the growth to slow down.
Several factors can come into play here such as whether you shake the culture, temperature and Mycelium vigour.
FAQ
What sugar works best for liquid culture? Light malt extract provides optimal results due to its combination of simple sugars and complex nutrients essential for robust mycelium development. Honey works effectively but may slow initial growth due to natural antimicrobial compounds, while other sugars like dextrose provide adequate nutrition with less complexity.
How long does liquid culture take to grow? Visible mycelium typically appears within 3-5 days when inoculating from existing liquid culture or agar transfers. Spore inoculations require 7-14 days before significant growth becomes apparent, with total development time varying by mushroom species and environmental conditions.
Can I reuse liquid culture syringes? Yes, thorough sterilization between uses enables safe syringe reuse. Disassemble completely and pressure cook for 15 minutes, or sterilize through repeated alcohol cleaning and flame sterilization of needles before each use.
Do I need a stir plate? While magnetic stir plates improve culture homogeneity, manual swirling daily provides adequate agitation for most home cultivation applications. Stir plates become more valuable when managing multiple cultures simultaneously or working with species that tend toward heavy clumping.
What’s the ideal sugar concentration? Maintain exactly 4% by weight concentration (24g per 600ml water) for optimal results across most mushroom species. Higher concentrations create osmotic stress that inhibits growth, while lower concentrations unnecessarily slow colonization rates.
How do I know if my culture is contaminated? Look for unusual colors (green, blue, black, pink), persistent uniform cloudiness throughout the solution, or foul odors that differ from normal mushroom aromas. Healthy cultures display white wispy mycelium with only localized cloudiness around active growth areas.
Can I make liquid culture without pressure cooker? No, proper sterilization requires sustained temperatures of 121°C (250°F) achievable only through pressure cooking at 15 PSI. Boiling water reaches only 100°C and cannot eliminate bacterial spores that cause contamination problems.
How much liquid culture do I need per grain jar? Use 5-10ml per quart jar of sterilized grain for optimal colonization balance. This ratio provides sufficient inoculum for rapid colonization without overwhelming grain with excess moisture that might favor contamination development.
Making liquid culture transforms mushroom cultivation from an unpredictable hobby into a reliable production system. The investment in basic equipment and ingredients pays dividends through faster colonization, reduced contamination, and dramatically lower per-unit costs compared to commercial alternatives. Start your first batch today and experience the difference that proper liquid culture techniques make for serious mushroom growers.


34 thoughts on “How To Make Liquid Culture For Mushroom Cultivation.”
Earlier traditional methods for multiplication of mushroom was used. This technique for multiplying the culture will be helpful for faster growth and full fill the demand of the mushroom growers.
how should I store my just made up liquid culture jar and for how long before refrigerating it? also what temp and lighting should I use when starting the new jar? thanks
Hi Chris,
I just put it on a shelf somewhere (room temperature), i don’t worry about lighting. After about 30 days I will move it into a fridge but really it depends on growth, if the there is a large clump (when i haven’t stirred it) or the jar is full with Mycelium (when i have been stirring).
Thanks.
Mr Mush thanks so much for the fast response I been looking for a page exactly like this that answered all my questions and finally found it thanks for all the info will help out and save me tons of $$$~~~Chris
I have successfully made liquid culture from your instructions (Thank-You!) I do have another question as I have successfully used up my culture and have Some left which is great my question is can I make this recipe up and add the remaining culture via syringe in the same manner and have a successful grade culture usable to the same effect thanks again~~~Chris
I think you are referring to transferring the culture and making more from your current leftovers? Yes i have done this with varied success so it does work.
The best way to do it however is when i use my culture (the first time i draw it into a syringe) I transfer some to a new jar then use the remaining culture (in the syringe) for inoculation. This means the needle hasnt been going in and out of the same jar more than one time.
Great thank you very much for the response~~~Chris
“However, you must take senescence into consideration (so use a master jar).” How and just how long can you keep it?
Thank you so much for a clear straight forward explanation. I have read other recipes before and yours is the best for me. I will try it and report back.
Good stuff here, and what the video teks do not share because then we will not need to buy spore syringes at all. Ive tried this from captured spores with no luck but I will get it!
Hi. I bought a magnetic stirrer. How long shall I stir it? And do I stir daily for a week?
People have different preferences. Pop it on the stirrer for 10 minutes a day would be my advice. You really just want the Mycelium to break up a bit and spread out so it doesn’t clump like some of my pictures above^.
Congratulations on an excellent fungal site.
I’m starting down the road of edible fungi with a slight complication.
We are living in Dominica, Caribbean island, minimum temp is 23, highs around 34. We are in a rain forest environment growing Cacao and Sugarcane. The idea is to use the Sugarcane waste as the substrate.
Any thoughts on the issues of the climate here ?
Leaf
Why does 4 teaspoons of honey in 400 ml of water sound too sweet? Is 4 teaspoons correct?
Yes a teaspoon is 5ml. So 4 of them is around 4-5% of 400ml. Dont get to worried about the exact figures here its far easier to just get a flat tsp measure (or just under) and mix it into 100ml hot water than weighing out sticky honey to exact figures.
This is just wonderful article. Great job!
So interesting, I’m going to try this methods
This is awesome I have been searching for this forever. So easy I’m going to do this
When I add honey to distilled water it instantly becomes cloudy even before pressure cooking it. Maybe it depends on the honey I use? Mine is organic honey.
Its best to use clear honey so you can see through the glass
Hello MrMush, I’m wondering if you are planning to write an article about how to make a tincture out of lion’s mane or other mushrooms. Pros and cons.
Thank you
Gaspar
Yes i am soon.
Thank you for this wisdom.
You need gas exchange if going from spores to oxygenate and remove metabolites. Source: Stamets – Growing Gourmet and Medicinal Mushrooms.
We do not have already prepared liquid syringe in my country so please, show me how to prepare liquid culture without any,
william
Checkout how to clone mushrooms, the syringe transfer method could be used used if you dont have access to LC.
https://ezmushroom.com/grow/how-to-clone-mushrooms/
Hello
Great article on liquid culture, seems like the best solution for me to use. I’m curious, can I take mycelium from a full jar and using a syringe put some into a fresh jar and keep this growing in this stage forever? I mean continue to put some from the mature jars into fresh jars. Does that make sense?
Yes you can do that eventually the mycelium will loose vigour but it will keep you going for a while.
You could also learn how to make / use agar then go from the liquid culture to the agar then chop the agar up and put it into the grains. Then next time repeat from the jar to the agar to the grain. That should last a while.
if LC doesn’n need air exchange why do you flip down the micropore tape? you can use self sealing injection ports
Because you cannot inject into a Jar without an air exchange hole. The jar pressure will not equalise in the jar as air needs to leave it, try it.
thanks, your instructions are perfect
How do you avoid rust on jar lids? I applied high temperature silicone to the edges of the hole
and one more question i have. what if i use a lighter instead of butane torch?
For the Rust I use rust cleaner like vinegar to remove it.
If you use a lighter it will be a lot slower and you’ll probably burn you finger before you heat the needle lol (done many times before).