
How to Grow Lion’s Mane Mushroom [In a Jar]
When I first set out to grow mushrooms Lion’s mane was the primary species which I wanted to produce. I searched everywhere on the internet to find a “how-to” guide on growing Lion’s Mane mushrooms at home but never came across a full step by step method of producing Lions Mane without lab equipment and without using plastic bags (urrrgh!!!).
The Lion’s mane mushroom is already a pretty easy mushroom to grow, the only issue I’ve run into with Lion’s mane was the need for a high humidity environment during fruiting. I discovered the mushroom will tolerate high CO2 environment remarkably well (however, the fruit becomes misshapen), but low humidity seemed to really effect the size of my fruits. It is definitely possible to grow your own lions mane mushrooms at home!
Inside my small flat, there was no space for a humidifier so I did several experiments on how to provide the 80-90% humidity required without a full growing space.
Forewarning!
There is one item that is an absolute requirement when it comes to growing the majority of mushroom species and that is a pressure cooker. The pressure cooker I use as a home hobbyist, and any other equipment we recommend for the hobby of mushroom growing can be found in our resources section.
So…What is the easiest method for growing Lions mane at home?
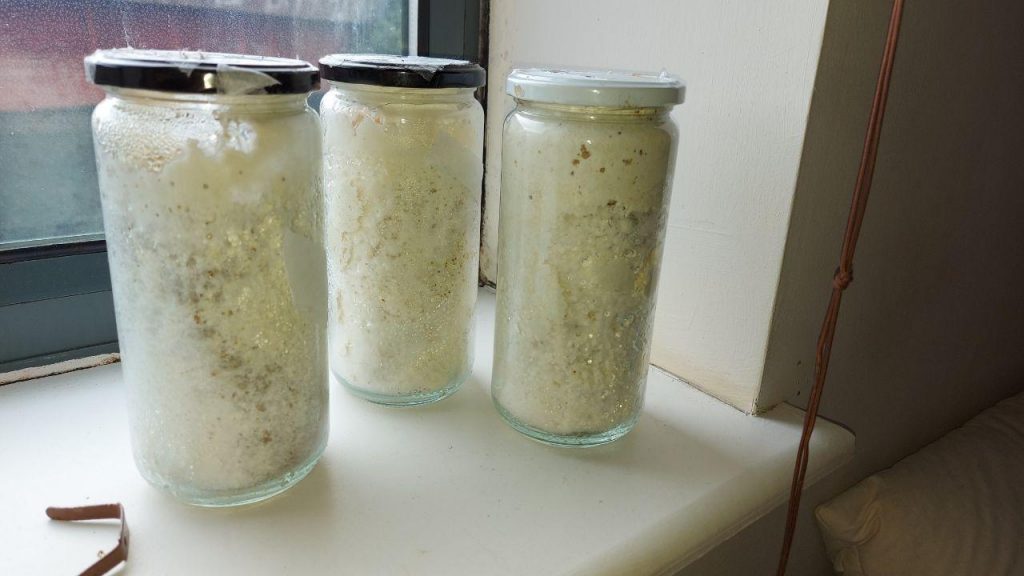
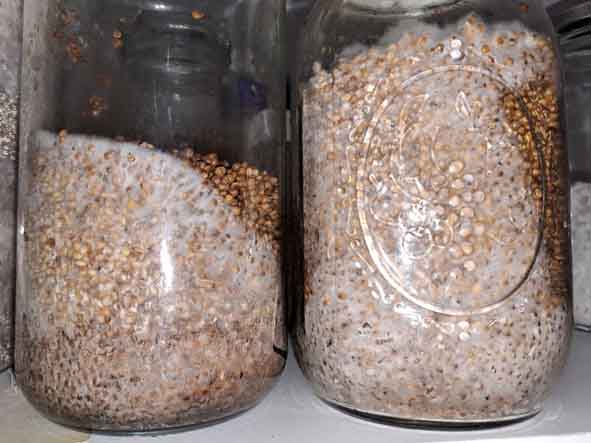
The easiest method to grow Lion’s Mane mushrooms at home is to use an enclosed environment like this jar which is filled with BRF substrate, sterilized and then inoculated with liquid culture spawn. This method may not produce the highest yields but it will greatly reduce the chances of contamination. Once inoculated it is possible to leave the jar without further attention until harvesting.
Here is a tutorial if you are looking to grow lions mane or other mushrooms using a mushroom substrate in a jar.
The secret key to this technique is leaving a 2inch gap between the lid and the substrate. This will create a small microclimate in the top of the lid where a Lion’s mane mushroom can fruit in 80-90% humidity, whilst also giving you room to inoculate the substrate with a culture syringe. This is a super easy method of growing lion’s mane without plastic bags or a humidifier.

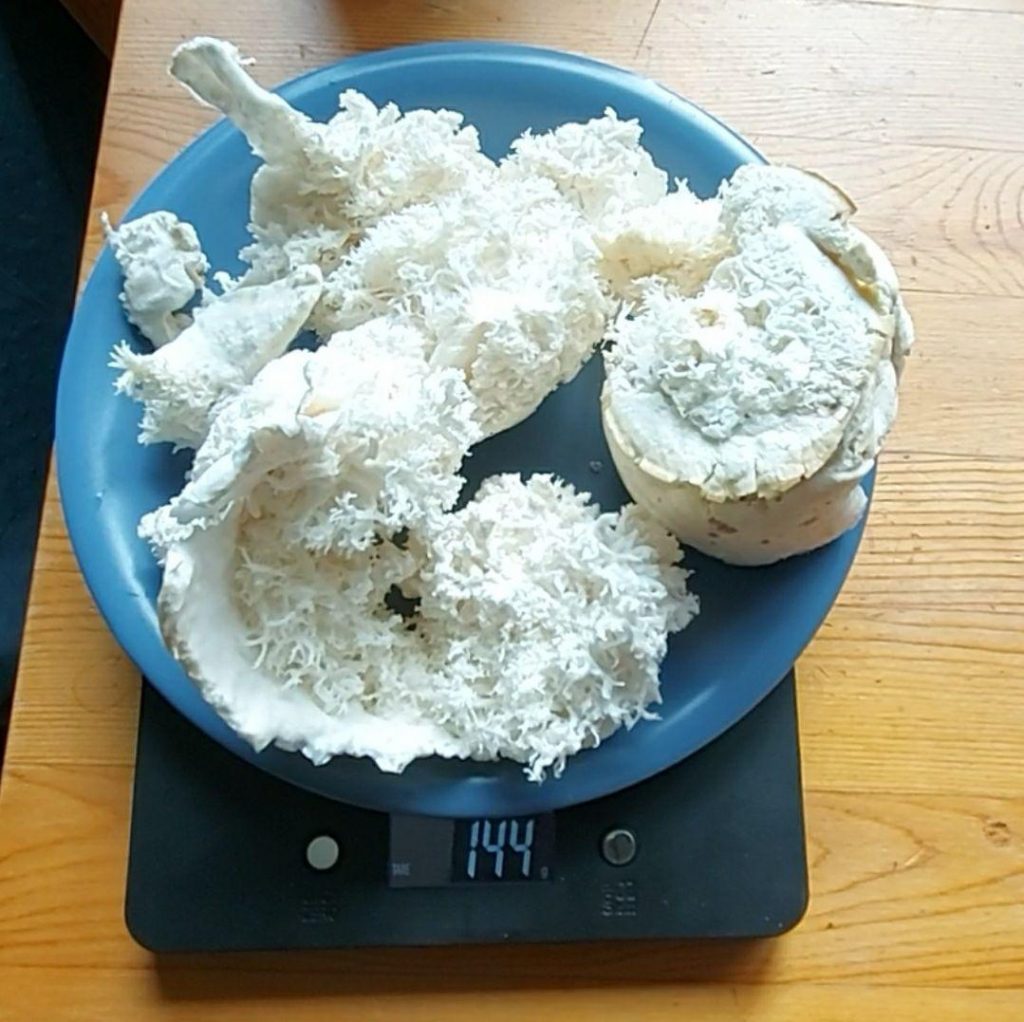


I have personally used this method many times producing 30-50gram mushrooms per jar. I then scaled this up to run 3-4 jars at a time. These numbers are not considered a high yield by any measure but it is pretty self-sufficient, and perfect for a beginner.
Below I am going to outlined the full step-by-step method.
Unlock the Secrets to Successful Mushroom Cultivation
Get our comprehensive instructions on mastering sterile techniques and growing mushrooms at home. Whether you're a beginner or looking to improve your skills, this ebook has everything you need to succeed.
Growing Lion’s Mane In A Jar [Easiest Method].
Estimates Yield: 26-50gram
Difficulty: Very Easy (PF Tek)
Grow time 30-60days
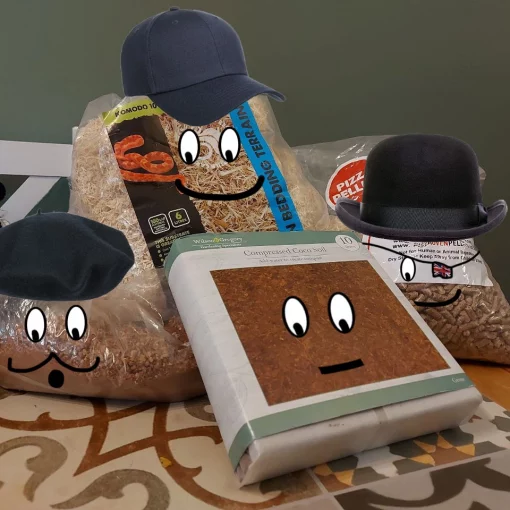
Full Requirements.
- A pressure cooker (best pressure cooker for mushroom cultivation).
- Jar 400-500ml (I use recycled Olive jars)
- Mixing Bowl
- Brown Rice Flour (500g min)
- Vermiculite
- LC syringe
- Rubbing Alcohol
- Butane Torch (seriously get one of these it makes flaming the needle very easy).
- Micro-pore Tape (discussion on other gas exchange lids here).
- Kitchen Foil
Step 1 – Prepare the Substrate
Step Requirements:
- Mixing Bowl.
- Mixing utensil.
- Jars of your choice.
- Micro-pore tape.
- Brown Rice Flour
- Vermiculite
- Water
- Screw Driver
- Foil
For one Jar preparation you will need (1 Jar 75% approx full)
- 190ml Vermiculite
- 95ml Brown Rice Flour
- 95ml Water
Note: The general formula for the “PK Tek” recipe is: 2 part vermiculite, 1 Brown Rice Flour, 1 Water.
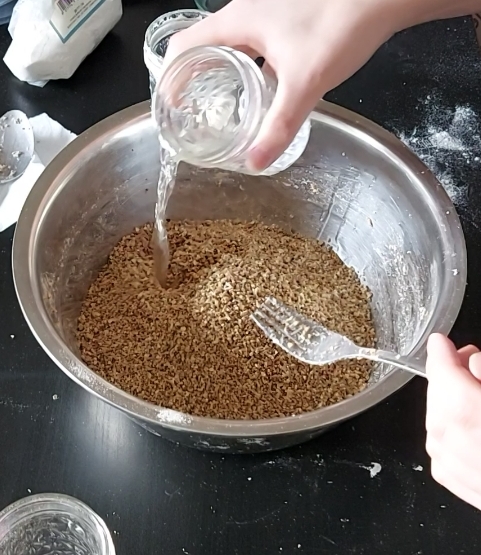
Mixing Method (estimate time 10minutes):
- Place the required amount of vermiculite into the mixing bowl.
- Stir water into vermiculite slowly to ensure it is absorbed equally.
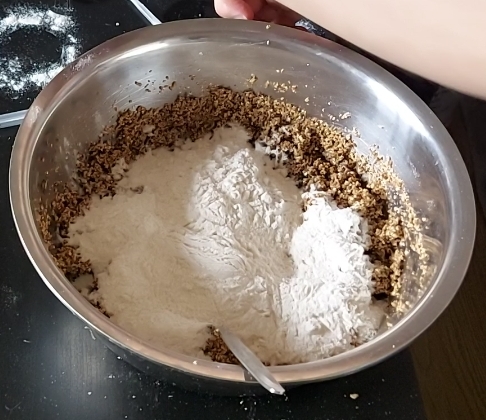
- Add Brown Rice Flour to the mixing bowl.
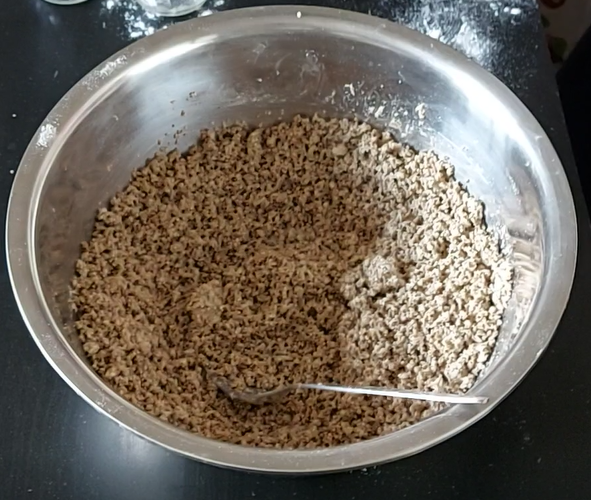
- Stir until the substrate is mixed evenly.
- Pack the substrate lightly into the jars, leaving gap (2.5 inch) at the top.
- Put lids back on the jars.
- Put a few holes in the jar lid using a screwdriver (ensure these are in the centre of the lid so the mushroom will grow up the sides and fill the gap to the holes to reach the open air).
- Place micro-pore tape over the lids.
- Place Foil over the lids

Step 2 – Sterilize the Jars (estimate time 1 hour)
Step Requirements:
- Pressure Cooker.
- Water
- Stove Top.
Sterilization
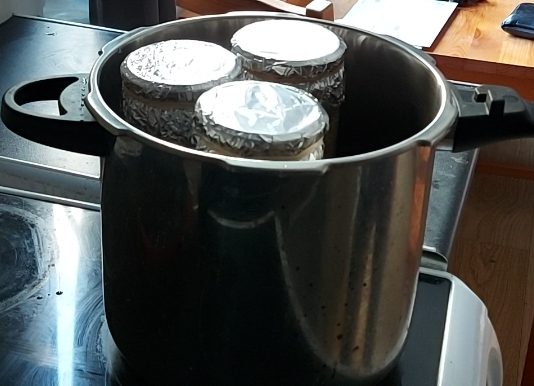
- Fill your pressure cooker with 1 cup of water and place the Jars inside, keep the jars raised from the bottom (I like to use a vegetable rack which came with the pressure cooker).
- Bring the Pressure cooker to 15psi using full heat then turn down to maintain pressue after 10mins. Leave for 50mins minimum (the longer the better).
- Allow the pressure cooker to cool down over-night, DO NOT OPEN UNTIL YOUR READY FOR INOCULATION.
Step 3- Inoculation (estimate time 30minutes)
Step Requirements:
- Pressure Cooker (with Jars inside).
- Spawn Syringe
- Foil
- BBQ Lighter
- Rubbing Alcohol/Alcohol Wipes
- Micro-pore Tape
Tips: Sterile technique is very important from this point going forward. Try to use the cleanest room possible, with little airflow.
- Find a surface in the house which is clutter-free and isn't within range of any air drafts or heavy foot traffic.
- Wipe the surface lightly with a cloth and water. I like to then place an A3 sized piece of kitchen foil down on top of the surface.
- Use a small amount of rubbing alcohol to clean the surface of the Foil.
- Go to the bathroom and wash your hands with soap and water for 20 seconds. Don’t forget to wash your wrists and thumbs.
- Remove jars from the pressure cooker whilst also wiping each jar down with rubbing alcohol.
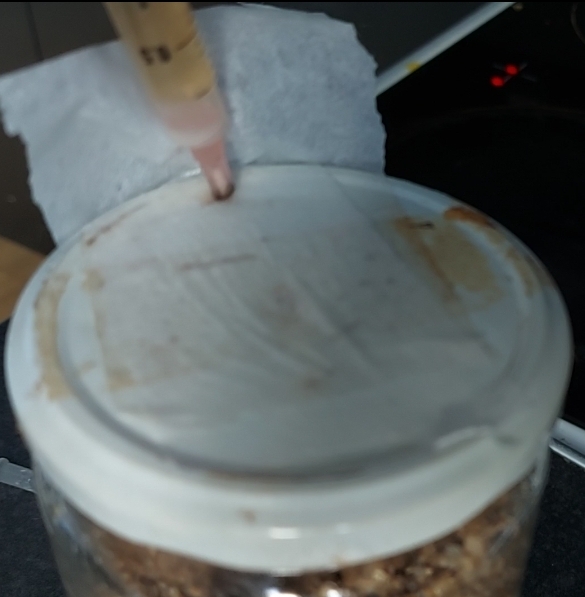
- Place the jars, spawn syringe and BBQ lighter on your work surface. *Edit* I recently bought a butane torch and it makes flame sterilizing needles very easy, the needle will glow red in 2 seconds without waiting.
- Remove the foil from all jars then place a 2-inch strip of micro-pore tape on the edge of each jar (long enough to cover your inoculation holes after you inoculate).
- Wipe the top of the jars with rubbing alcohol again.
- Shake your spawn syringe and then flame sterilize the needle until it glows red.
- Inject 1-3cc of spawn into an inoculation hole you’ve made. As you pull the syringe out flip the micro-pore tape down to seal the Jar.
- Repeat steps 8-10 for each jar.
- Place all your jars inside a room with temps 18-20 degrees C. (I use a box on the top of a mini-fridge, it is perfect).
Note: if anyone hasn’t followed the advice of using a BBQ lighter and instead used a standard light then they probably just ended up with a burnt thumb after the spark piece heated up beyond recommended levels! (Ouch… been there!)
I now recommend using a butane torch instead since getting one.
Step 4 – Wait
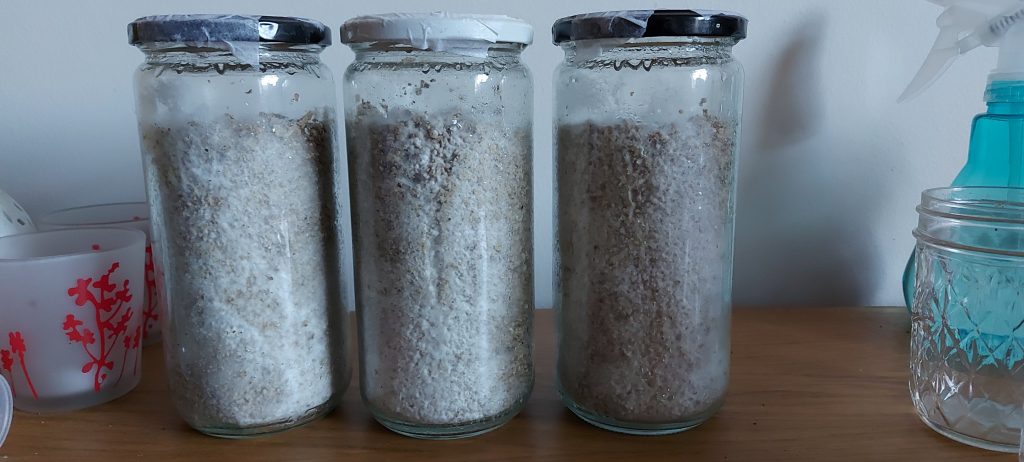
- Don’t touch the jars for about 3-4days, there wont be much action anyway and you'll just increase the chance of contamination.
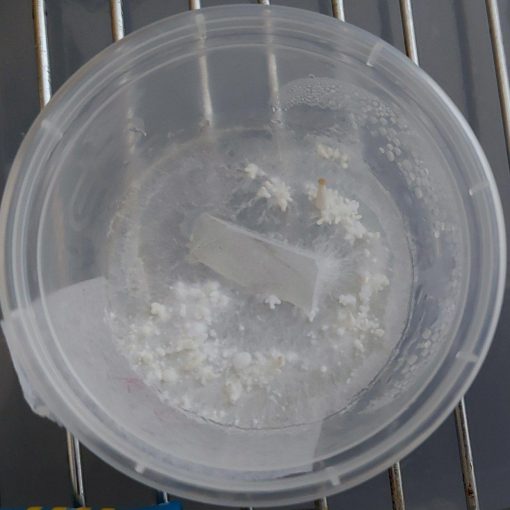
- Look out for any signs of contamination, but remember lion’s mane is thin and wispy! Don’t let your anxiety trick you into throwing it because you think its cobweb mold (Cobweb will grow super fast, look grey and grow in a chaotic pattern).


Step 5 – Fruiting
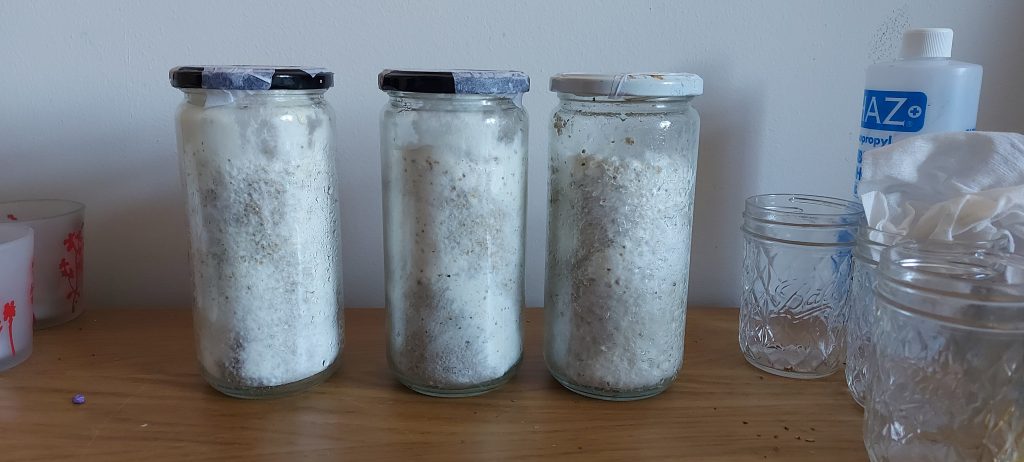
- Once the Jar is close to full colonized take it and place it into a lower temperature environment (15-20 deg C) here it will fruit in the air gap left at the top.
- If fruiting doesn't start automatically you can remove the lid and wrap the jar in a ziplock bag with a cut in the top for air exchange.
Note: Lion’s mane LOVES to fruit so don’t be surprised if it starts fruiting sooner than expected, just let it do its own thing. As I keep saying this method is pretty set and forget.
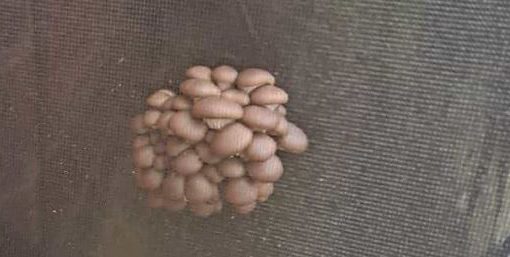
Step 6 – Harvesting
- This step is pretty simple, run a knife around the jar between the mushroom and the glass, then spoon out the mushroom.
Congratulations you've just grown a Lion's Mane Mushroom!
Is It Possible To Fruit A Second Lion’s Mane Mushroom From the Jar?
Yes, I have had second fruit come out of the jars after my first fruits. Some of the pictures in this blog post are from the second flush so I know 100% it can work.
To do this I filled the jar up with water, leave it over night and then poured the water out in the morning. I then put the lids back on, put the jar back in my colonization box for a few days until the Mycelium became fluffy again. Afterwards I moved the jars into a lower temperature environment and new flushes grew. If the Jar does not become fluffy again within a few days just throw it.
So, in my experience it does work, although I have seen people refuting the idea online and it is a bit hit or miss.
Is Growing Lions Mane Cheaper Than Buying Supplements?
Once I had the initial investment for growing apparatus out the way producing my own mushrooms supplements was a lot cheaper than buying any supplements online.
Another added benefit of growing this mushroom myself is, I know for definite I am getting 100% fruiting body dosages in my supplements. So I'm never sat there googling “best lions mane supplement” in the hopes of finding someone who genuinely uses the fruiting body!
How Can I Improve My Lions Mane Yield?
If you want to improve the yield you should first create grain spawn then learn how to create sawdust blocks for fruiting.
