
Introduction
Although buying a pressure cooker for mushroom cultivation is probably the best course of action if you are thinking about starting to grow mushrooms at home; not everyone can justify the purchase.
It's possible you don’t have the money or space for a pressure cooker; OR you are unsure if growing mushrooms is a hobby you would enjoy.
If this is the case, don’t give up just yet, it is still possible to grow mushrooms without a pressure cooker or sterilizer, however, the techniques are not ideal.
If you are looking for “how to sterilize mushroom substrate without a pressure cooker” then you are in the right place, however you cant sterilize mushroom substrate without a pressure cooker, instead you are going to pasteurize it instead.
If you are interested in the difference then checkout “pasteurizing mushroom substrate” where i touch on the topic in more detail.
So…
Can you grow mushrooms without sterilization?
Yes! It is possible to grow mushrooms without full sterilization, without using a pressure cooker.
The technique:
Using this post choose any method for making spawn then any method for making bulk substrate.
Then put the whole process together to grow mushrooms without a pressure cooker.
Sterilizing Grain Spawn without a Pressure Cooker.
The first stage of growing mushrooms is making initial mycelium spawn.
Several techniques have been discovered over the years which allow you to create spawn without a pressure cooker.
These techniques require that you are working with a liquid culture or spore syringe and still require moderate sterile technique.
PF-tek without a Pressure Cooker.
The PF-tek method can be used to create spawn without a pressure cooker, instead of sterilizing the jars they are placed in boiling water for around 2 hours to sterilize the brown rice flour and vermiculite substrate.
It is a pretty simple technique! All it requires is a small amount of preparation to get the substrate mixed correctly and a boiling pan of water.
I also recommend you checkout my PF-tek using an Instant Pot post.
Requirements
6 Wide Mouth Mason Jars (1/2th pint)
Gas exchange lids (alternatively you can learn how to make them here).
Liquid Culture/spore syringe.Brown Rice Flour (240ml).
Butane Torch (seriously get one of these it makes flaming the needle very easy).
Rubbing Alcohol (alcohol wipes alternatively).
Face Mask and Rubber gloves.
Large Pot (or Instant Pot).
Still Air Box (Optional, how to make one here).
Step 1 – Create Substrate Mix.
To create the substrate mix for PF-tek you must mix 2 part vermiculite, 1 part Brown Rice Flour and 1 part water (2:1:1).
We will be creating 6 jars worth of PK tek substrate for our spawn.
The mixture must be made in the correct order or you will ruin it, so, this is how you do it:
- Place 3 cups of vermiculite into a mixing bowl.
- Pour 1.5 cups of water over the vermiculite whilst stirring with a spoon. You want all the water to be absorbed evenly as possible into the vermiculite.
- Pour 1.5 cups of BRF on top of the wet vermiculite then mix it with a spoon. You want an even consistency wherein you can no longer differentiate between BRF or vermiculite.
Step 2 – Pack Substrate into Jars.
- Lightly pack the mixture into your mason jars. Don't pack it down too tightly, leave the substrate loose. Leave a small gap (1-inch) at the top.
- Fill the small gap at the top with vermiculite. This works as a small barrier to airborne contaminants when you inoculate and is helpful for beginners.
- Place gas exchange lids on the top of jars.
- Place foil over the top of the metal lids which cover about ¼ of the jars. Then secure these in place with elastic bands.
Step 3 – Boil Jars.
- Place jars inside a large pot.
- Fill the pot up with water until the water submerges the glass jar up to where the substrate stops.
- Boil the jars for around 2 hours, ensuring the pot doesn't run dry.
- Turn off the boil and let the jars cool down slowly before removing the jars from the water.
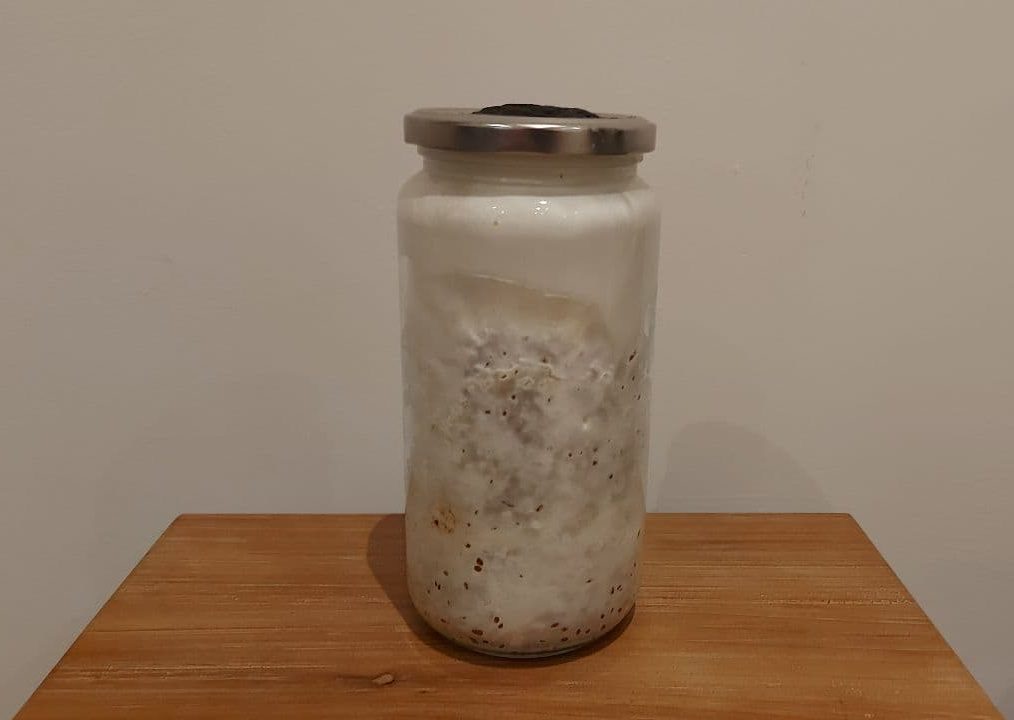
Note: Alternately, it is possible to place your PF-tek jars inside an Instant Pot cooker on the highest pressure setting for 2 hours as well (adding about a cup or 2 of water). This will create a similar spawn product as seen above.
Step 4 – Inoculate Jars.
In this section, I will discuss inoculating the substrate with a liquid culture syringe. I am going to suggest using a still air box however it is possible to do this without a still air box as shown in this post how to grow lion's mane in a jar.
- Place all your jars into a still air box whilst wiping each down.
- Wipe the top of the jars with alcohol wipes.
- Flame sterilize your needle using a butane torch until it is glowing red then move it into the still air box.
- Inject 1cc of solution through the injection port/micropore tape.
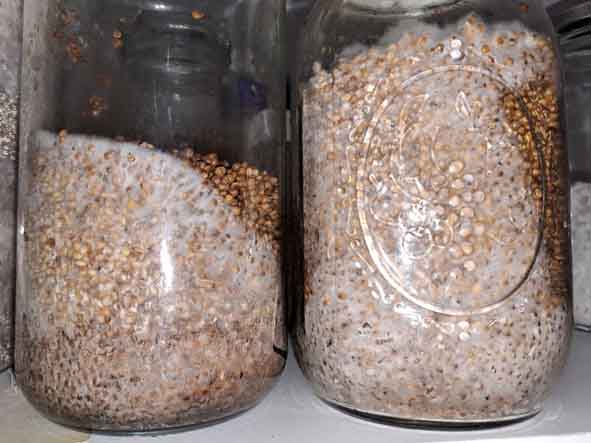
Step 5 – Wait.
Wait until the Jars have fully colonized. This means waiting about 5 days after the Jars are fully covered in white and you can no longer see the substrate.
Step 6 – Spawn to Bulk.
There are multiple techniques for spawning to bulk which you can read in my post how to spawn to bulk when growing mushrooms.
Uncle Ben’s Tek
The first time I saw this technique I think was on reddit. The concept is simple uncle ben's or any other 1 minute rice product has to be cooked, sterilised then inserted into the vacuum bag before reaching our shelves.
As a result, inquisitive mushrooms growers have adopted uncle bens brown rice as commercially prepared grain spawn on supermarket shelves everywhere.
Requirements
Uncle Ben's Wholegrain Rice Packet x 3.
Liquid Culture/spore syringe.Brown Rice Flour (240ml).
Butane Torch (seriously get one of these it makes flaming the needle very easy).
Rubbing Alcohol (alcohol wipes alternatively).
Face Mask and Rubber gloves.
Soapy water and spray bottle.
Still Air Box (Optional, how to make one here).
Step 1 – Prepare Items.
Collect all the items you are going to use, place a small piece of micropore tape (don't press it down hard) on the Uncle Ben's packet where you intend to inject your solution.
You will probably need at least 3 of Uncle Ben's per grow.
Spray down your still air box with soapy water then wipe each item down with alcohol and place it inside the still air box. Leave your butane torch and syringe outside the still air box.
Step 2 – Pack Substrate into Jars.
- Break up the rice using your hands by squeezing the packet multiple times and moving the grains around.
- Flame sterilize the needle with your butane torch until it is glowing red, then carefully move it into the still air box.
- Lift micropore tape off the uncle ben’s packet and insert the needle directly into the rice packet.
- Inject 1cc of spawn into your uncle ben’s packet.
- Slide-out the needle whilst pressing down the micropore tape to secure the packet.
- Finally, cut a very small edge off the top corner of the packet and then cover it with micropore tape.
Step 3. Wait.
- Put the packet somewhere safe.
- Wait around 20 days for the grains to colonize, don't constantly touch or fiddle with the bag, leave it alone until you're ready to open them. Any contaminated or foul-smelling packets should be thrown away instantly.
Step 4. Spawn to bulk.
Mix the grains with your choice of bulk substrate and allow it to 100% colonise before fruiting.
Purchase Grain/Sawdust Spawn.
If all else fails you could purchase grain or sawdust spawn of your favorite gourmet mushrooms to spawn into the bulk substrate.
This can be a great way for beginners to learn the fruiting stages of mushroom growing before undertaking the more difficult spawn creation phases.
his is because the mycelium is well established and less likely to contain contaminants as it has been prepared by a professional farmer.
Sterilizing Bulk Substrate without Pressure Cooker.
Making bulk substrates without a pressure cooker is a bit more straightforward than making grain spawn, especially when growing gourmet mushrooms.
Instead of sterilizing the substrate growers can pasteurize bulk substrate at a lower temperature without a pressure cooker.
Unlike when creating spawn, pasteurization is widely recommended when creating a bulk substrate (as long as you don't add extra nutrients to your mixes, such as soy hulls or coffee.
Fortunately, there are a variety of techniques that can be applied to create bulk substrate without a pressure cooker.
This section will only be a brief description of the steps to create your bulk substrate without a pressure cooker. I have a more detailed post how to pasteurize bulk substrate at home which details the “what and whys”.
Hot Water Bath Pasteurization using a Large Pot and Thermometer.
This technique is simple and cheap. It requires some baby sitting and checking of temperatures to get it correct but overall it is an acceptable technique for making bulk substrate.
Requirements
Bulk substrate (hardwood fuel pellets, oak sawdust, coco coir, etc).
Hob/Stove.
Access to a water tap.
Step 1 – Fill Large Pot with Water.
Fill your large pot with water about halfway up the pot. Turn on the heat and monitor the water until it reaches 65-82C (150 – 180F).
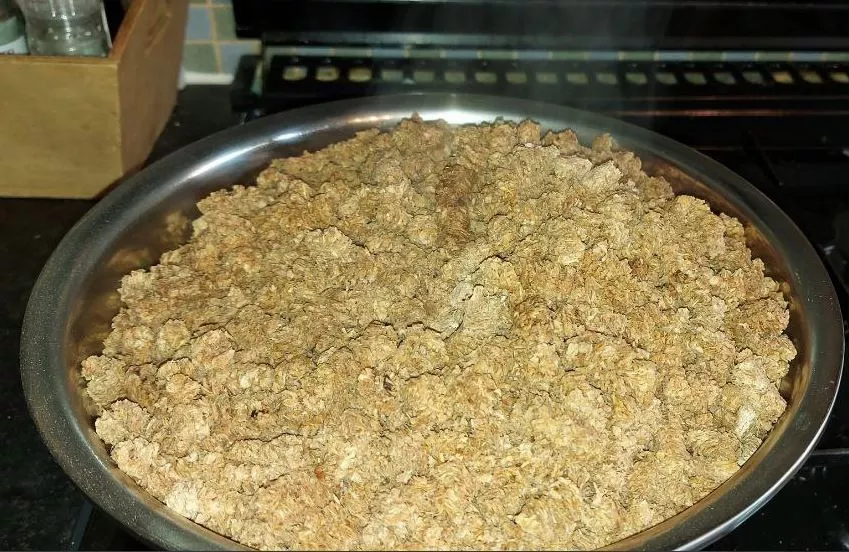
Step 2 – Submerge Bulk Substrate.
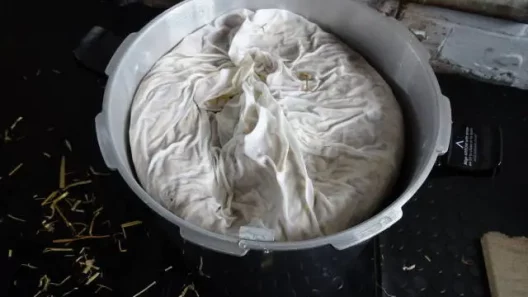
Submerge your bulk substrate in the heated water. You can either just pour it in loose or you can place your substrate into an old pillowcase to keep it contained in the pot.

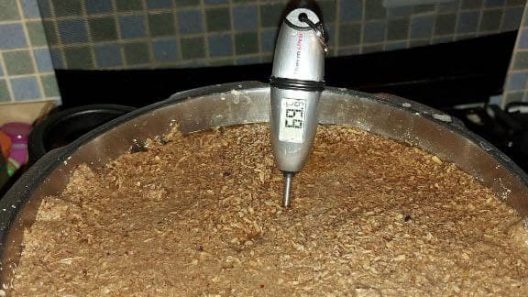
Step 3 – Check Temperatures.
Recheck the temperature of the mixture using a thermometer, you want to keep it within the range of 65-82C (150 – 180F).
Once these temperature of substrate reaches the upper range turn off your hob and allow the mixture to sit for around an hour (if the temperature drops out of the range turn the heat back on).
Step 4 – Allow Substrate to cool.
Allow the bulk substrate to cool before removing it from the pot, the bulk substrate should be back at room temperature before adding spawn to avoid thermal shock.
Step 5 – Squeeze out excess moisture levels.
Squeeze out excess moisture from the bulk substrate. The correct moisture level will produce only a few drops of water when squeezed in a fist.

Step 6 – Spawn to Bulk.
Set out your bulk substrate in preparation for adding your spawn. If you need deeper instruction follow the guide how to spawn to bulk.
Hot Water Bath Pasteurization using an Instant Pot.
It is possible to pasteurize bulk substrate using an instant pot. The “warm” setting on the instant pot is used to keep food warm at a temperature between (145 to 172°F).
For pasteurization, we want temperatures between 65-82C (150 – 180F) so as long as we leave the instant pot running for long enough we should reach the correct pasteurization temperatures.
The benefit of this setup is the simplicity, no need to use a pillow case and the instant pot has an internal bowl. Alongside this you don't have to keep an eye on the pot as it is all automated.
Requirements
Bulk substrate (hardwood fuel pellets, oak sawdust, coco coir, etc).
Step 1 – Add Bulk Substrate.
Add bulk substrate and water into you’re instant pot. Fill it as close to the Max sign as possible.
Step 2 – Turn on Instant Pot.
Turn the Instant Pot on the “WARM” setting.
Step 3 – Wait.
Leave the instant pot on for 1-2hours.
Step 4 – Remove Substrate.
Remove bulk substrate from the instant pot. Squeeze out the excess water from handfuls of the substrate until only a few drops are falling.
Step 5 – Spawn to Bulk.
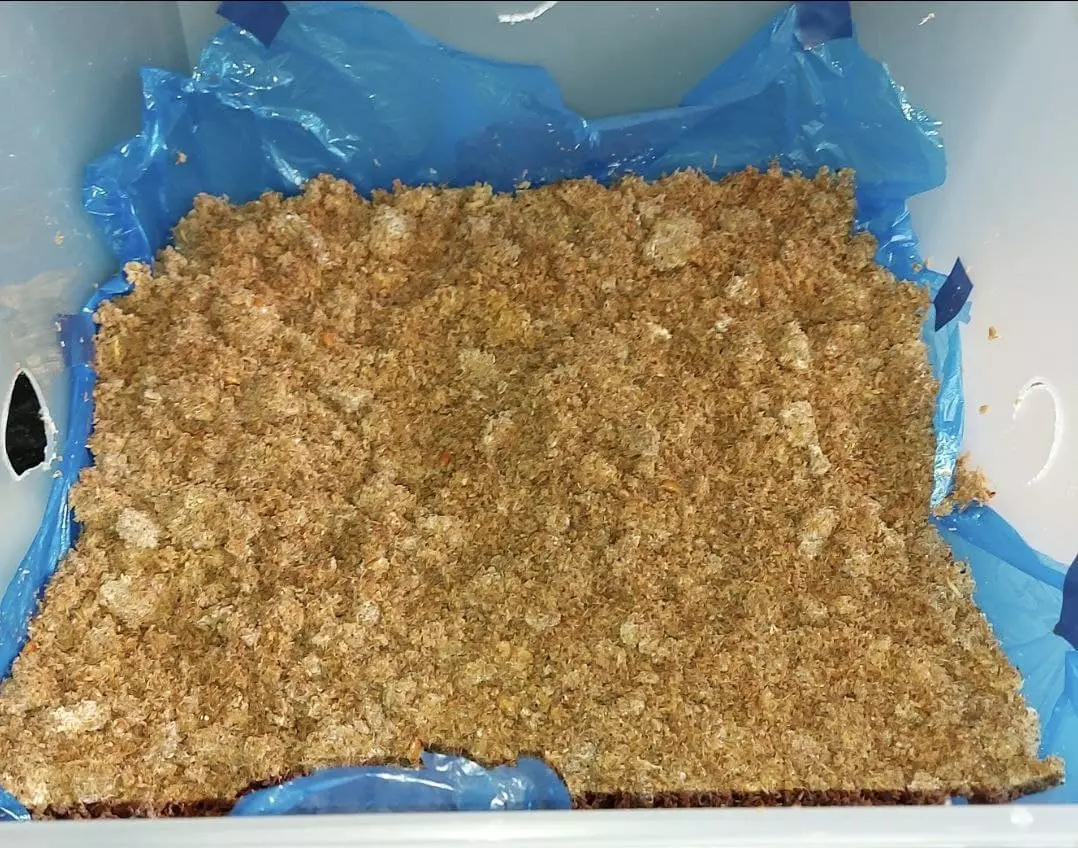
Place bulk substrate into an incubation vessel (such as monotub or grow bags) in preparation for spawning to bulk.
Hot Water Bath Pasteurization using a Sous Vide.
Using a sous vide for mushroom cultivation is a great choice for beginners.
This little known method for producing bulk substrate without a pressure cooker is very simple, its basically an electric water bath.
A sous vide is a device that is used for cooking meats at very precise temperatures and because we can set very specific temperatures it is possible to use it to pasteurize bulk substrate.
I quite like this method as it is very low maintenance and doesn't even require the use of a stove.
You could attach the sous vide to the side of a bucket in your bedroom and pasteurize in private without making a mess of the kitchen.
Requirements
Bucket or Large Pot (which is heat resistant).
Bulk substrate (hardwood fuel pellets, oak sawdust, coco coir, etc).
Access to tap.
Step 1 – Fill Pot with Water.
Fill the pot/bucket up with water. Turn on sous vide for temperature 143F (62c) and place in the water.

Step 2 – Prepare Substrate.
Place you substrate into a pillow case then tie the end. I will be using a net bag used for brewing.
Step 3 – Turn on Sous Vide.
Turn on sous vide for temperature 180F (62c) and place in the water.
Step 4 – Add Substrate to Water.
Place the bags of bulk substrate into the sous vide and turn down the temperature of the water to 170f (62c).

Step 5 – Wait.
Leave pillow case of bulk substrate for 1- 2 hours submerged in the heated water.
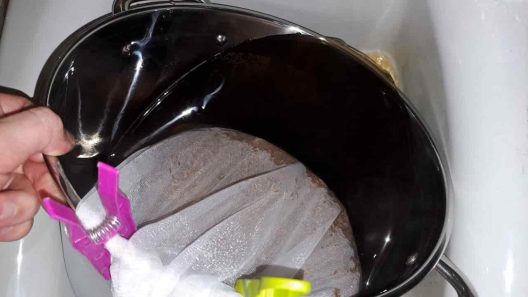
Step 6 – Remove Bulk Substrate.
Remove bulk substrate from the water bath and then pour out the water in the pan down a sink. Place the bulk substrate back into the pan to drain and cool
Finally, follow the instruction here on how to spawn to bulk for mushrooms.
Cold Water Lime Pasteurization.
Another method to grow mushrooms without a pressure cooker is to use Hydrated Lime (Calcium Hydroxide) to pasteurize the bulk substrate.
This method does not require heat and instead prepares the bulk substrate by raising the PH of the mixture to a level where the competitive contaminants cannot grow.
Personally, this is one of my favourite methods for preparing substrate as you can set it up and leave it overnight ready to use in the morning.
Alongside this, I think the Hydrated Lime PH level helps keep contaminants at bay throughout the growing lifecycle.
Requirements
- Hydrated Lime (Calcium Hydroxide) – You must make sure this is the LOW in magnesium version. The version I use has “Magnesium Oxide (MgO:) <0.23%”, but anything less than 4% will probably do.
- Bucket with lid – The larger the better.
- Rubber gloves – hydrated lime will irritate your skin if it touches it.
- Eye protection and Face Masks (a good all in one solution).
- Bulk substrate (hardwood fuel pellets, oak sawdust, coco coir, straw etc).
- Old pillowcase/Net bag (optional).
- PH testing kit (optional).
- Access to a tap.
Step 1 – Get Prepared.
Put on your rubber gloves, eye mask and face mask. Hydrated Lime is an irritant so you need to prevent it from going in your eyes or getting on your skin.
Collect all your items together either in a well-ventilated bathroom or outside in a garden.

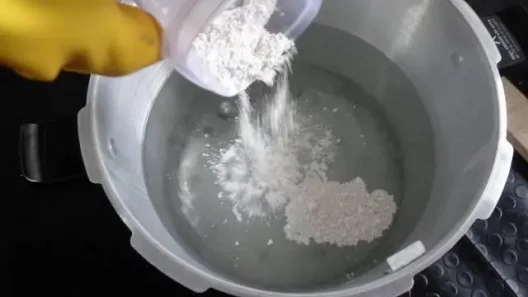
Step 2 – Mix the Lime Bath.
Fill your bucket with about 4 litres of water then add 8 grams of line to the bucket and mix with a wooden spoon (the mix ratio is 2g Lime to every 1L water).
Step 3 – Test the PH Levels.
Using the PH tester check the PH level to ensure the mixture is between 11-13 PH (this step is optional but recommended).
Step 4 – Add Substrate.
Add substrate into the lime bath and mix, ensuring the substrate is submerged.
Step 5 – Wait.
Leave the substrate submerged for 12-24 hours to pasteurize.
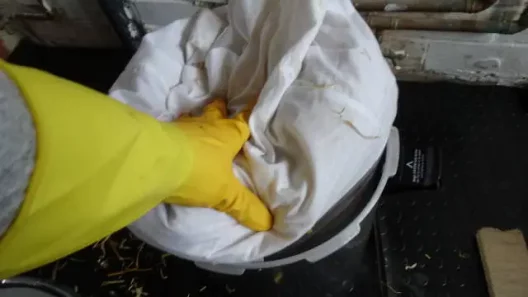
Step 6 – Remove Bulk Substrate.
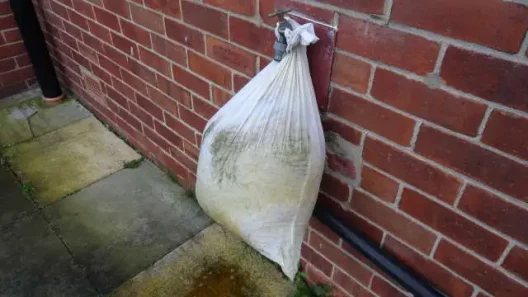
Remove bulk substrate from the water bath and then leave it hanging up to drain for 30mins. It is ready to be inoculated with spawn.
Inoculate the Bulk Substrate.
Finally, you must inoculate the bulk substrate with your grain spawn which you created in the first step.
In short, this is done by:
- Breaking up your BRF cakes and mixing them with a bulk substrate
- Shaking your grain jars up, then mixing them into bulk substrate
- Cut your packet open for uncle bens-tek and mix it into a bulk substrate.
If you want deeper guidance on this checkout spawning to bulk substrate.
Putting it Together.
So now you should have a better understanding of how to grow mushrooms without a pressure cooker, I am going to summarize the process:
First, you must choose a method for preparing grain spawn and then inoculate the grain spawn with either liquid culture, agar or spores.
Next, choose a method for preparing a bulk substrate.
Finally, you must place the prepared grain spawn into the prepared bulk substrate. This is know as spawning to bulk.
Wait for the bulk substrate to 100% colonize, then, introduce fruiting conditions.
If all else fails…
Buy a grow Kit
If this all sounds too difficult and you are unsure if trying your hand at growing mushrooms you can always buy a grow kit which has already been setup for you.
Such as this Oyster mushroom grow kit or this prepared BRF kit.


