

PF Tek For Growing Mushrooms
Alright, so in this post, we're diving right into a detailed, step-by-step guide on the PF Tek method for growing mushrooms.
PF Tek is an awesome starting point if you're new to mushroom cultivation. It's a favorite among home growers and boasts some of the best biological efficiency you can get from any substrate.
I've used PF Tek for many of my own grows and testing. Now, it might not be the top choice for gourmet mushrooms, but it's fantastic for getting your feet wet. I've successfully grown Pioppino, Freckled Chestnut, and Shiitake using this method. I even tweaked this technique a bit to fruit Lion's Mane in jars. So, I've got a pretty solid grasp on what works and what doesn't with PF Tek.
PF-Tek Substrate Recipe.
The general ratio for the recipe is 2 part vermiculite, 1 Brown Rice Flour, 1 Water. This can be scaled up or down to suit your needs.
PF Tek Substrate Calculator.
Need a recipe for 12 pf tek jars? Put 12 in the total jars field.
The ingredients for the substrate mix have the following uses:
-
Vermiculite is a lightweight and highly absorbent mineral often used in gardening. It's ideal for mushroom cultivation as it helps retain moisture and improve aeration in the substrate mix, crucial for healthy mycelial growth.
-
Brown Rice Flour (BRF) is made by grinding brown rice into a fine powder. It's a popular choice for mushroom substrates because it's inexpensive and easy to find in health food stores. BRF is rich in nutrients, supporting the growth of mushroom mycelium. If you can't find BRF, you can make it at home by grinding whole brown rice in a coffee grinder until it reaches a flour-like consistency. Rye flour can also be used as a substitute.
-
Water is an essential component of any mushroom substrate.
The jars I will use will be tall ½ pint mason jars. The original tek developed by Robert PF Martin in the 1990s used short stubby jars like this but they were not available when I bought my jars.
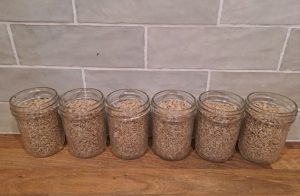
In this post we will be making 6 x 1/2 pint mason jars 350ml.
PF Tek Method For Mushroom Cultivation.
Requirements.
Instant Pot (or a pressure cooker).
Water.
Mixing Bowl.
6 x 1/2 pint wide mouth mason jars.
Spore or LC syringe.
Nail or sharp object.
Tin Foil
Elastic Band.
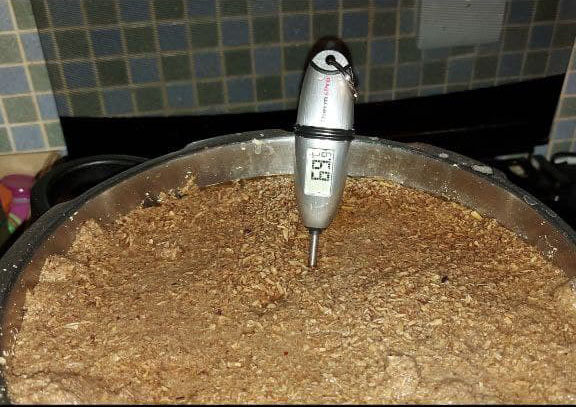
Step 1 – Prepare Mixture.
It is important to follow these steps in the correct order. Not paying attention to the order will ruin your substrate.
Put 3 jars of vermiculite into the mixing bowl.
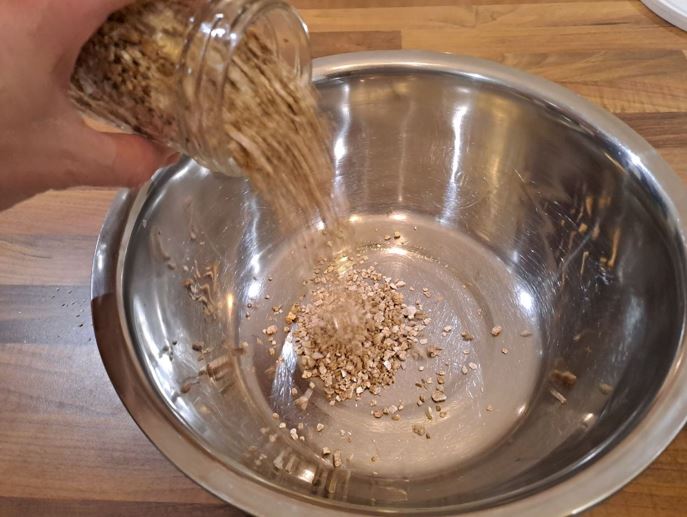
Pour 1.5 jars of water into the bowl of vermiculite, carefully stir and mix the vermiculite so it fully absorbs the water.

A good way of checking this is by just tilting the bowl slightly there should only be a small pool of water left in the bowl.
Pour 1.5 jars of BRF on top of the moist vermiculite and mix until you can no longer differentiate brown rice flour from the mixture.
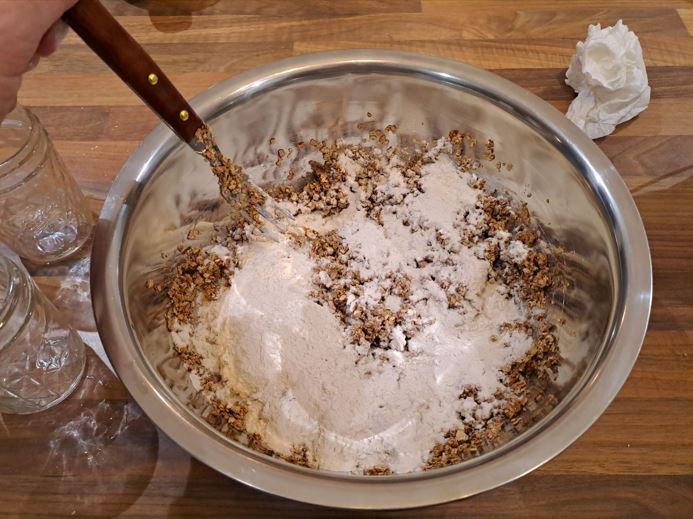
The mixture should look like the following picture when complete.
Step 2 – Fill The Jars.
Take the lids off your jars and start filling them with the BRF/Vermiculite/Water mixture.
Its best to use a spoon for this, try to keep the rim of the lid clean.
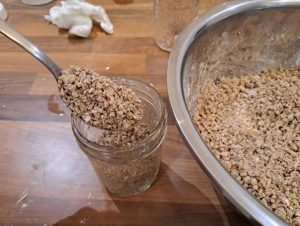
You want to keep the contents of the jars light and fluffy so don't pack it down too much as the mycelium has to be able to grow across the mixture easily.
Try to avoid getting mixture stuck on the outside of the jars or around near the lids, if this happens take a damp cloth and wipe off any excess.
We do this as these areas could become a place where contaminants start before making their way further down the jars.
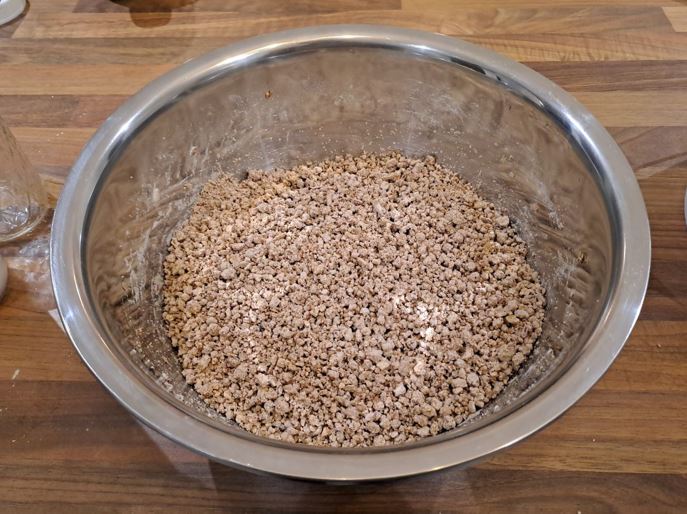
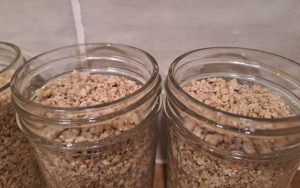
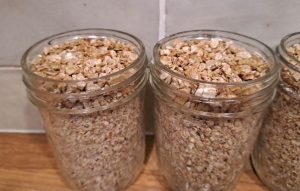
The picture below shows a lightly packed PF Tek mix. Dont pack it down hard, it should be aerated and crumbly.
Following this tek should make 6 jars which come up to the first ring on the rim.
Finally fill the top of the jar with dry vermiculite. If you are a beginner it gives your substrate an extra barrier against contaminants and increases the likelihood you will have a successful PF-tek growth.
Step 3 – Prepare Lids.
Next place your lid on each of the jars and grab your nail and a solid object (like a hammer) to create the holes in the lids.
Hammer 1 – 4 holes (1- 2mm) in the lids creating a square as close to the edge as possible.
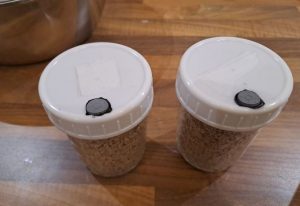
Place a layer of micro pore tape over each of the holes.
Below are lids I use, if you are interested in using this type of lid checkout how to make mushroom jar lids.
Realistically though these are overkill for PF tek.
Then, cover each lid with a piece of tin foil which goes down around the neck of the jars.
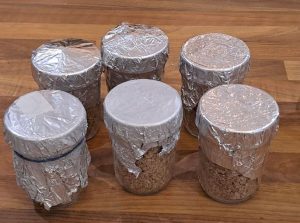
Secure each piece of foil in place with an elastic band.
The Foil and micro pore tape is used to ensure that no excess moisture from inside the pressure cooker gets inside the jars and ruins the mixture.
It also works as an extra layer of protection for the jars when you remove them from the pressure cooker after sterilization.
Now your jars are ready to be sterilized.
Step 4 – Sterilize Using A Pressure Cooker.
This is a very important step in PF-tek and although this technique is far more forgiving than other teks it is still important to do this correctly.
Sterilizing the jars destroys the majority of competitive contaminants inside the jars giving our mycelium the best change to dominate the substrate before any competition does.
Here I will discuss how to using an Instant pot for sterilization.
Add 2 quart jars worth of water into the Instant Pot pressure cooker.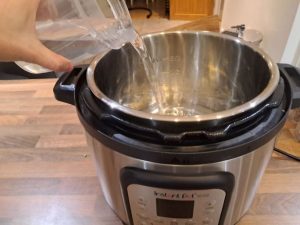
Place a rack at the bottom of the pressure cooker to raise the jars from the bottom and prevent the substrate from burning or overheating.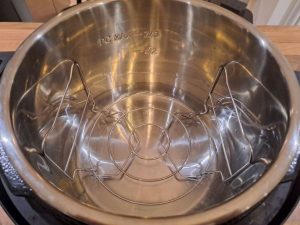
Put your jars on top of the rack, water should come up to about 1/3 of the jar this is fine. 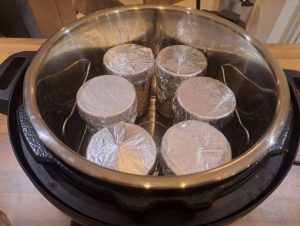
Close the lid of your Instant Pot pressure cooker and do the following:
- Press the “Pressure Cooker” button.
- Press the + temperature button to set the High Setting.
- Press the + time button to set the timer to 2.5 hours atleast.
- Press the “Start” button.
Now the instant pot will sterilize the PF-tek substrate at 12 psi for 3 hours. We have extended the sterilize time because the instant pot only reaches 12 psi.
If you have a 15 psi pressure cooker you can sterilize for 90 minutes instead.
Once the Instant Pot time completes turn it off and leave the pressure cooker to cool off overnight.
If you don’t do this the changes in temperature between the jars and outside environment could cause contamination.
DO NOT RELEASE THE PRESSURE.
I recommend leaving the pressure cooker to cool overnight and starting the next part of the process the next day.
Step 5 – Inoculation.
Inoculation PF-tek requires injecting your substrate with a liquid culture or spore syringe; this can normally be done on a kitchen counter or similar if you give your surface a wipe down with soap beforehand.
However for the best results you should probably use a still air box.
Let's begin…
Collect the following items on your work surface:
Butane torch lighter (this makes flame sterilizing your syringe extremely easy, seriously get one).
Alcohol or Alcohol Wipes.
Liquid Culture or Spore Syringe.
Put on a pair of rubber gloves and a face mask.
Wipe down your hands (rubber gloves) with alcohol solution.
Remove your jars from the pressure cooker and give each one a wipe down with alcohol then set them in front of you.
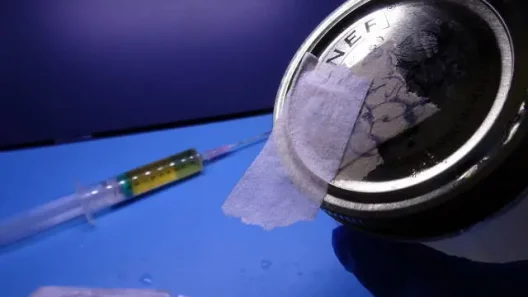
Take the foil off the lids of each jar then give the top of the micropore tape a light wipe down with alcohol.
Once that alcohol has dried you need to place a new piece of micropore tape on the top of the lid and fold it backwards.
It should be enough to fold over the puncture hole in the current micropore tape protecting the jars.

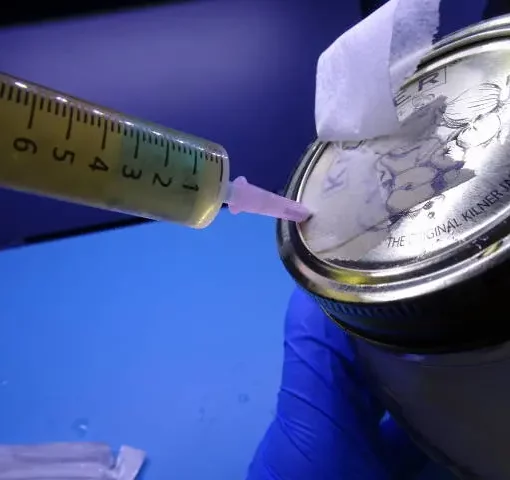
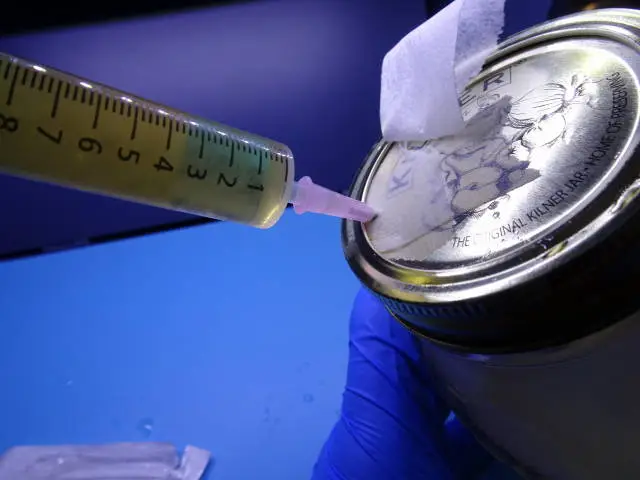
Next take your liquid culture syringe and screw on the needle then shake the syringe vigorously to spread out the contents.
Take your butane torch lighter and heat the needle up until it is glowing red.
I like to move up and down about 80% of the needle but be careful not to melt the plastic at one end.

Now while the needle is still hot puncture through the micro-pore tape into the jar, you want the needle to be fully down.
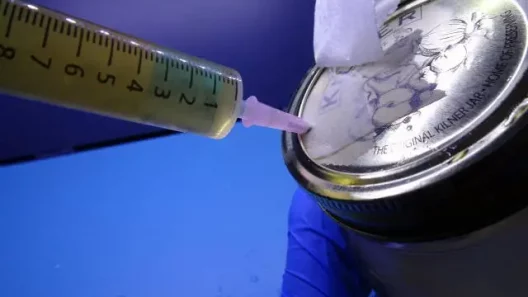
Next, Inject 1ml of solution into the jar then remove the needle.
As you remove the needle you need to flip down the folded piece of micro-pore tape as fast as possible.
Repeat these steps (including wiping your gloves down, wiping the jar lids, re-sterilizing your needle, etc) for every jar you have.
Step 6 – Incubation.
Incubation is basically the process of putting your jars on a shelf at room temperature where you wont keep handling them or messing with them.
Honestly the hardest part about this step is resisting the urge to constantly look at your jars. Just put them away in a cupboard at room temperature for at least 7 days and come back to them.
Your jars should be fully colonized in 14 -30 days depending on things such as; which strain you are growing, if you are using spores or liquid culture, etc.
There are many factors in play here so it's best to just be patient.
Once your jars are completely covered in fluffy white mycelium and you can no longer see any substrate then the jar is complete.
It's best to just wait until all your jars are complete then use a front runner early so just be patient.
Step 7 – Fruiting.
Fruiting is the process of inducing mycelium to fruit mushrooms and can be done a few ways such as; using a fruiting chamber, fruiting from the jar, etc.
However for this guide we will be discussing how to fruit Pf Tek style in a shotgun fruiting chamber.
Alternatively check out my post on spawning to bulk if you are planning on using a monotub.
To start you will need to gather the following items:
PF Tek jars (fully colonized).
Vermiculite
Shotgun Fruiting Chamber (SFC).
Once you have all the required items it's time to continue.
First thing, put on some rubber gloves and a face mask and wipe your hands down with alcohol.
Next we are going to dunk and roll the cakes, so fill a bowl up with water then remove each cake and dunk it in the water then leave it to float in the water for about 1 hour.
Once complete you need to roll the cake in a pile of dry vermiculite so that the cake is covered.
Finally place your cake into a shotgun fruiting chamber then wait for them to fruit.
Benefits of PF-Tek.
The PF-Tek recipe has a few key advantages over other methods:
First, it is a relatively simple method, and, although I highly recommend everyone purchases a pressure cooker for mushroom cultivation, it is possible to grow mushrooms using PF-Tek without using a pressure cooker.
Second, it is versatile and can be used to grow a variety of different mushrooms.
It can even be used as a substitute for grain spawn when spawning in bulk.
Third, it is relatively easy to control the environment in which the mushrooms are grown, making it possible to achieve consistent results as the mycelium isn't exposed to contaminated air before fruiting conditions are introduced, great for beginners.
Conclusion.
It can take up to 2 weeks for the mushrooms to start growing but be patient and soon you will have a beautiful harvest of PF-Tek mushrooms.
By following the instructions and paying close attention to the process, it is possible to achieve great results. With a little practice, anyone can learn to grow mushrooms using Pf-Tek.
If you enjoyed this why not checkout our full post on Instant Pot Tek for mushroom cultivation, here you will find all the possible use cases for a instant pot as a home mycologist.
